Navy Blue Bar Stools With Rub-on Transfer | Easy Thrift Store Makeover
As an Amazon Associate, I earn from qualifying purchases.
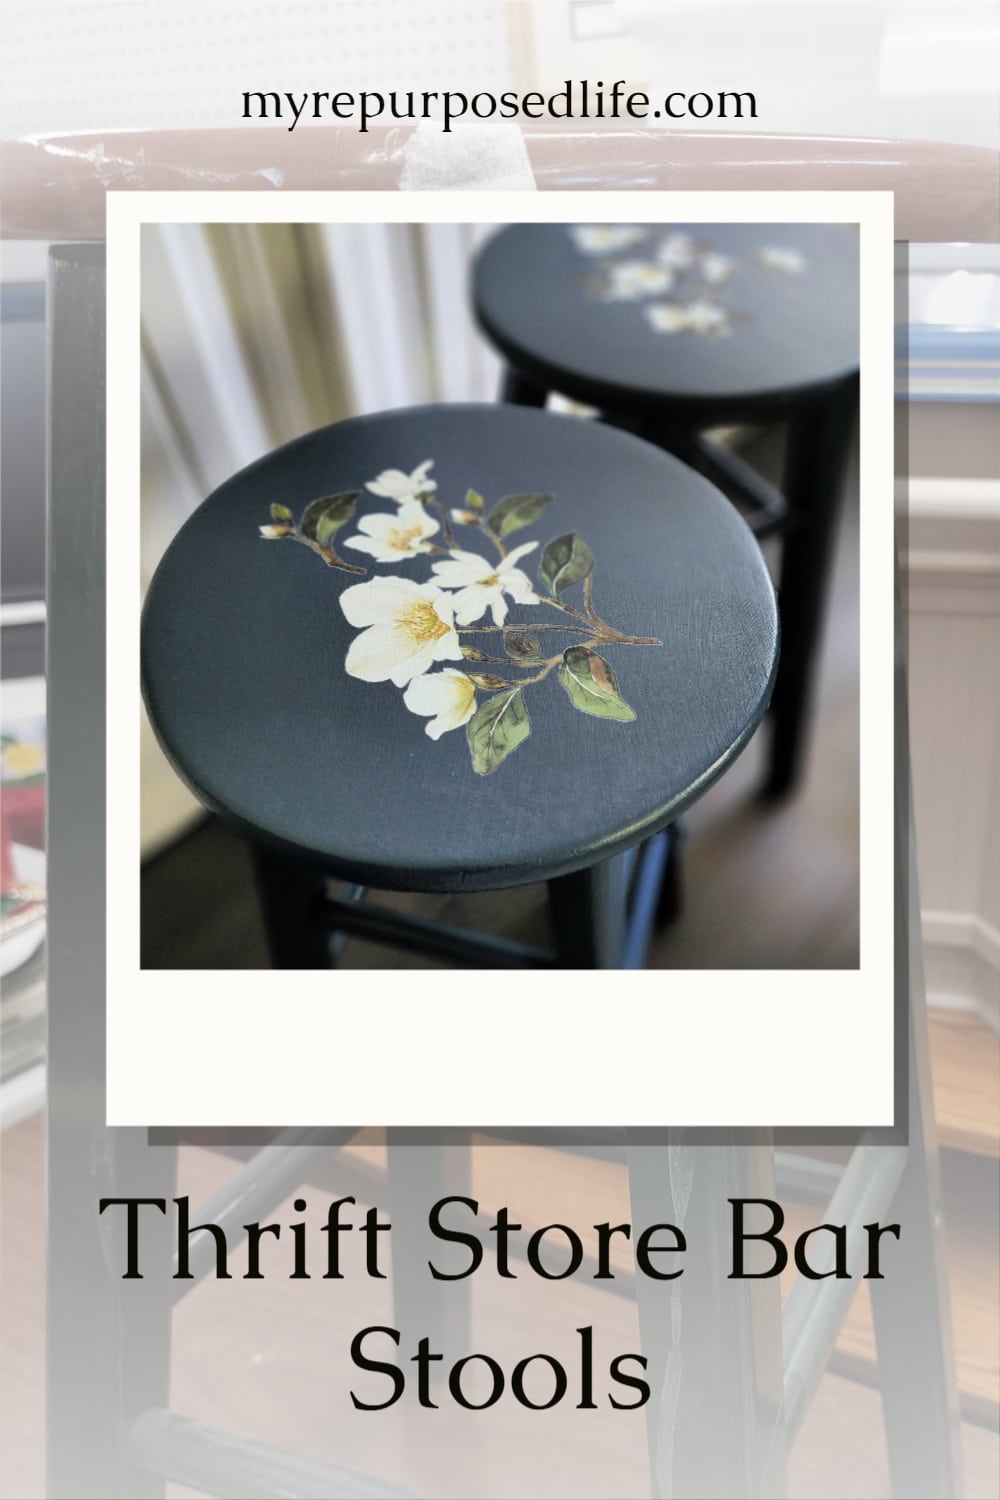
Thrift store bar stools are always worth a second look, especially when they only need a little repair and a fresh finish. These wobbly stools started out plain and a little tired, but I had a fun makeover in mind. Of course, like many DIY projects, there was a small hiccup along the way when my original plan didn’t quite work out. A quick pivot, some navy blue paint, and a pretty rub-on transfer gave these stools the second chance they deserved.
As it turns out, there were a couple of twists and turns in this thrift store decor project. I am always totally honest with you in my tutorials here on the blog.
This is our Thrift Store Day. Be sure to check out all the projects below.
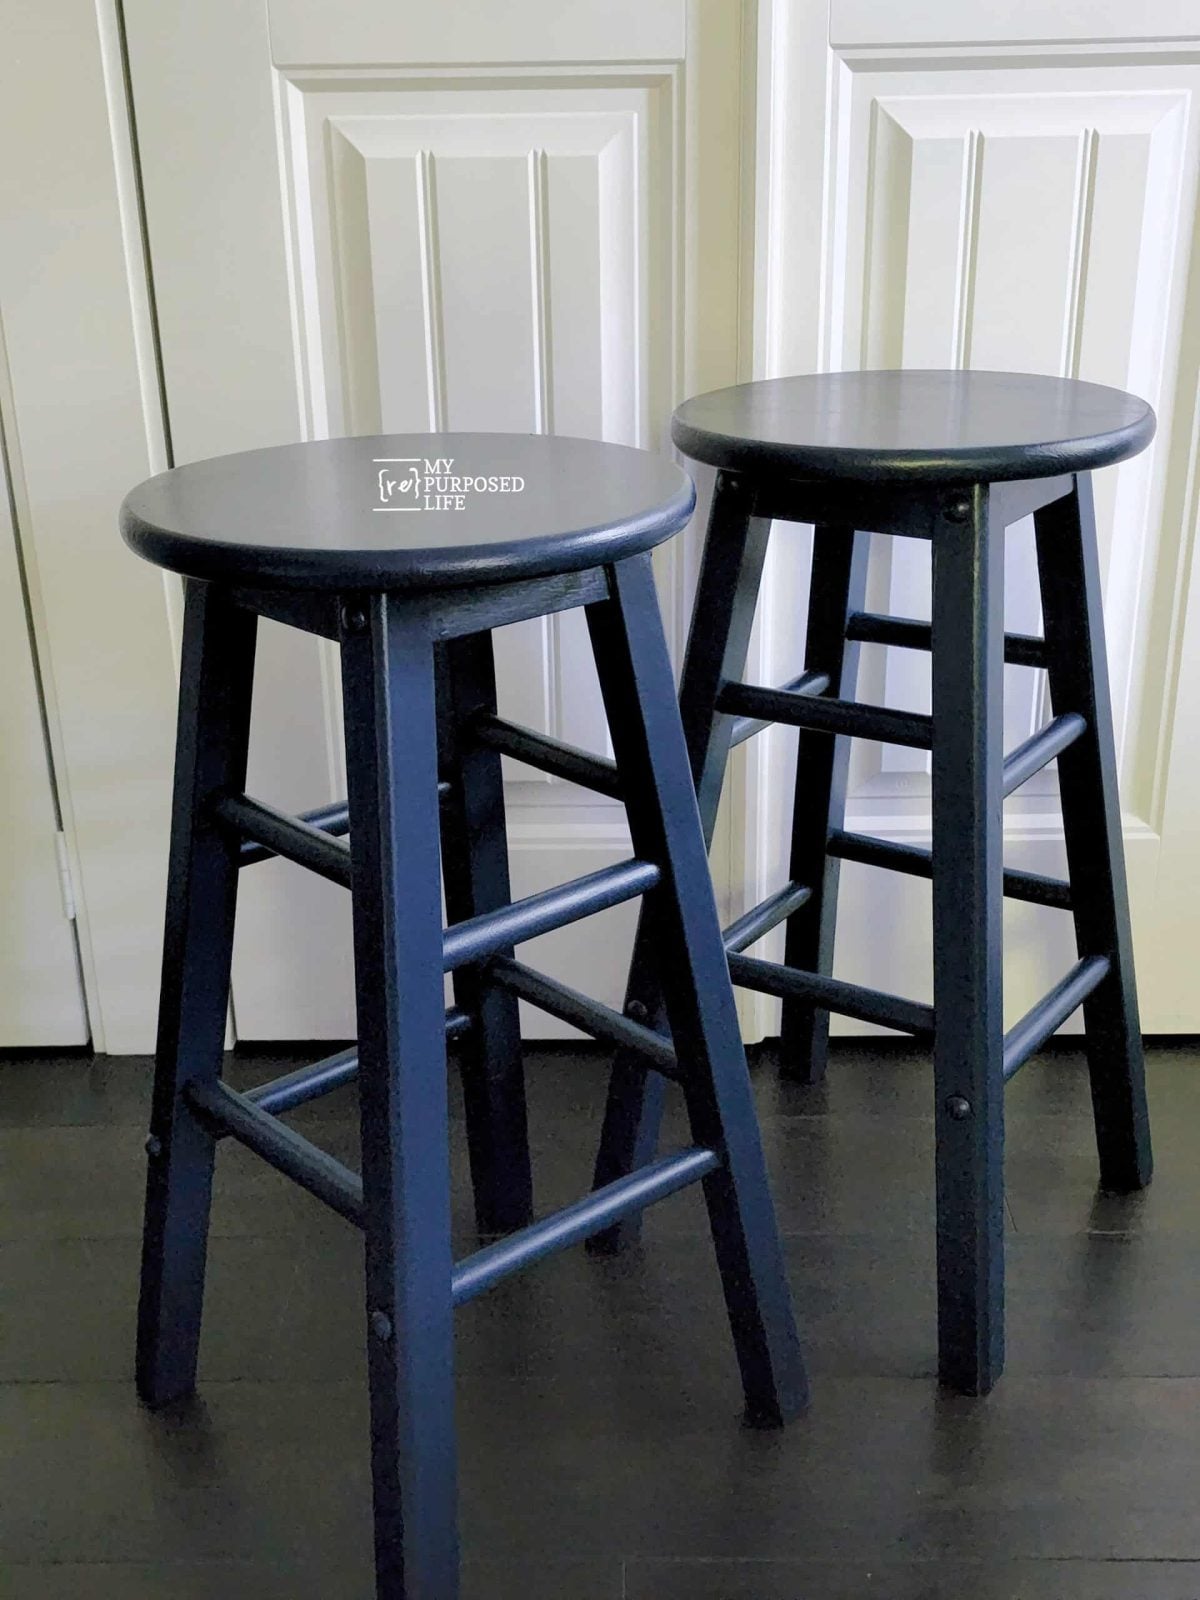
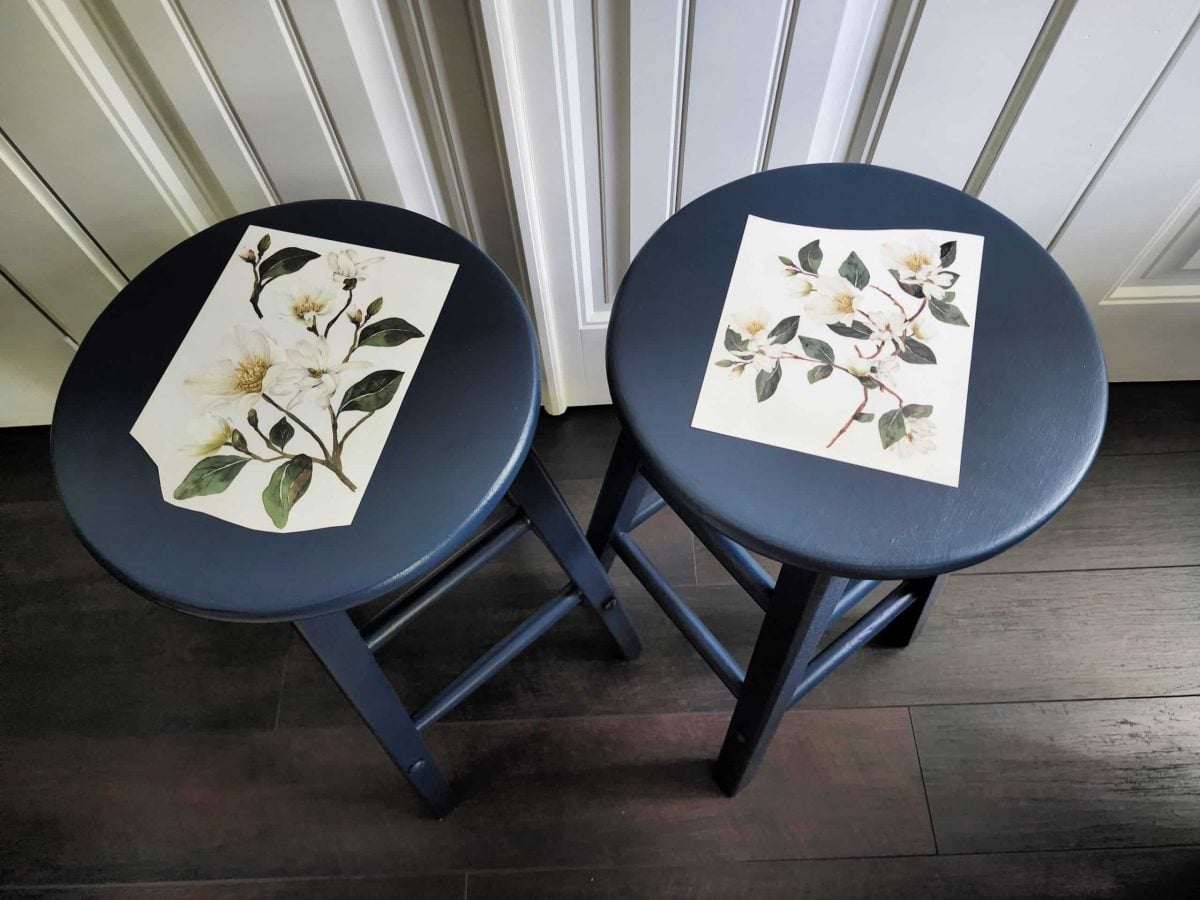
So, here’s how the navy blue bar stools turned out . . .
At this point, maybe I should have stopped. You will see that I tried to decoupage the navy blue barstools, then painted them back to Navy. Finally, I went with a prima decor rub-on image transfer.
Thrift Store Bar Stools
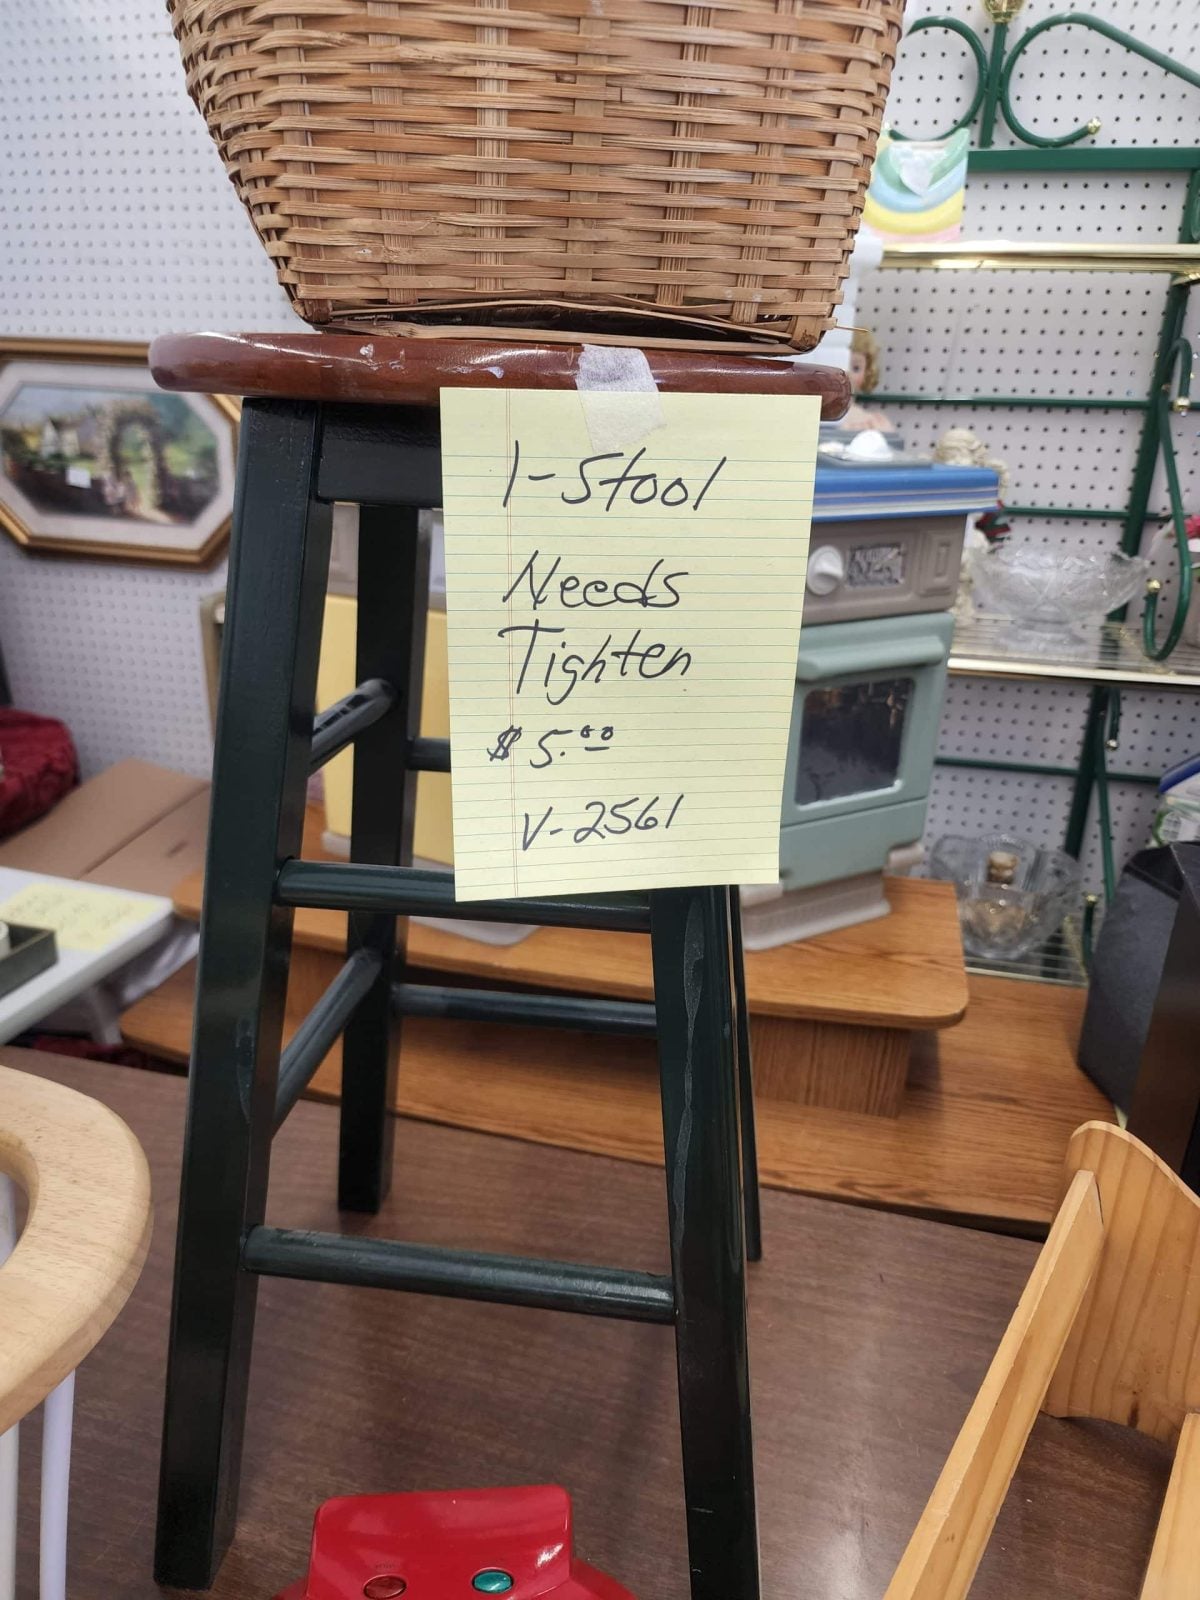
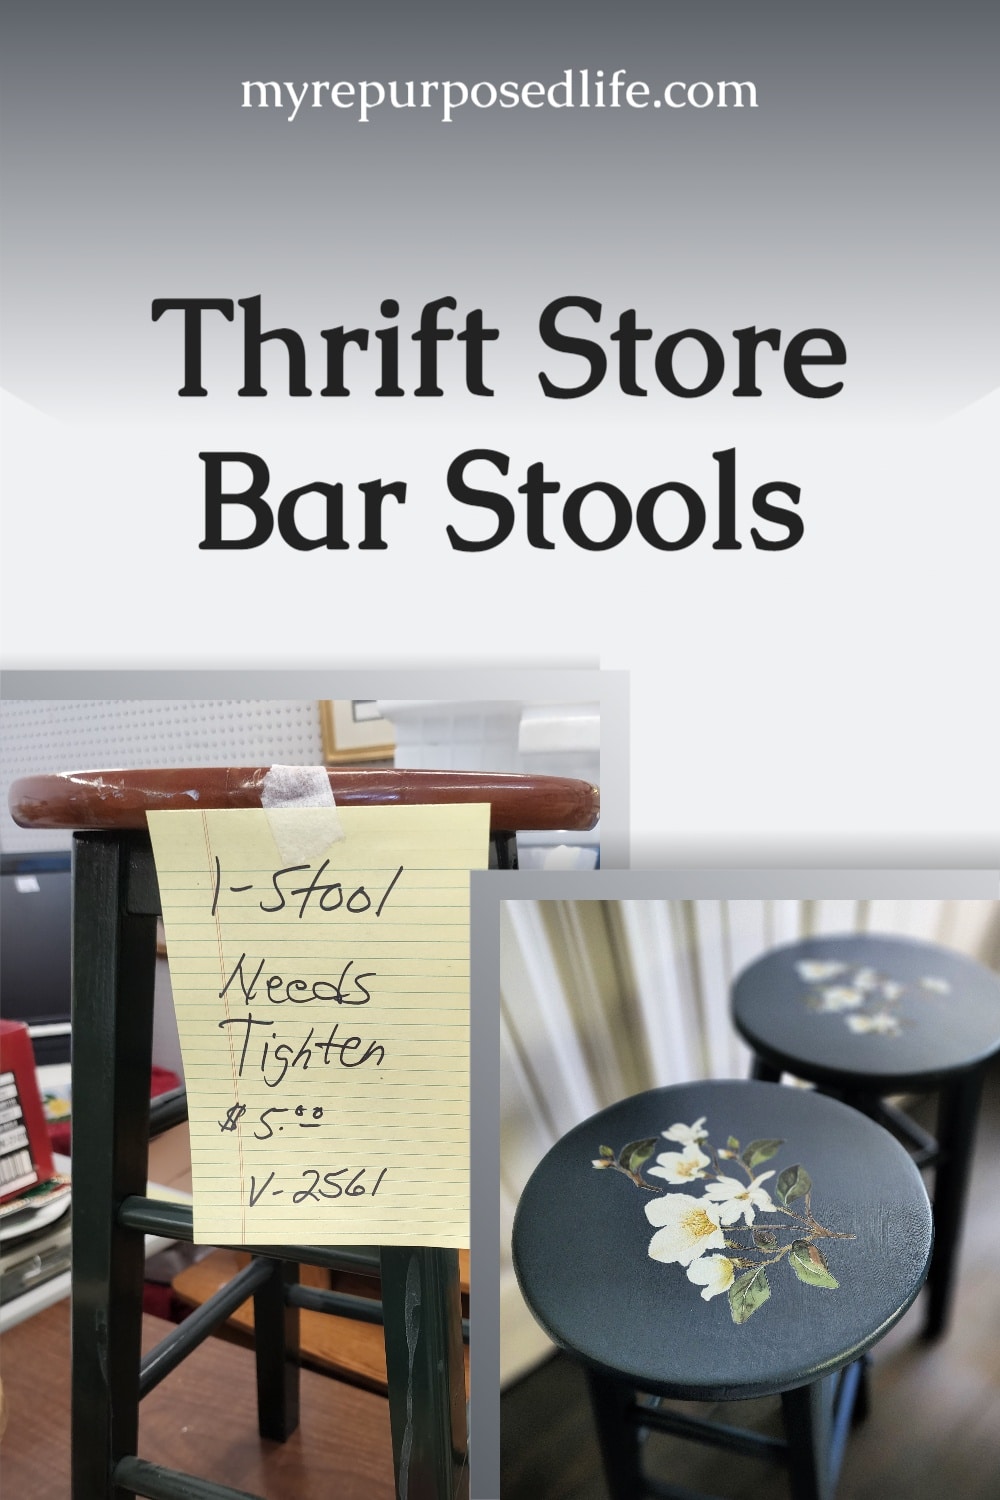
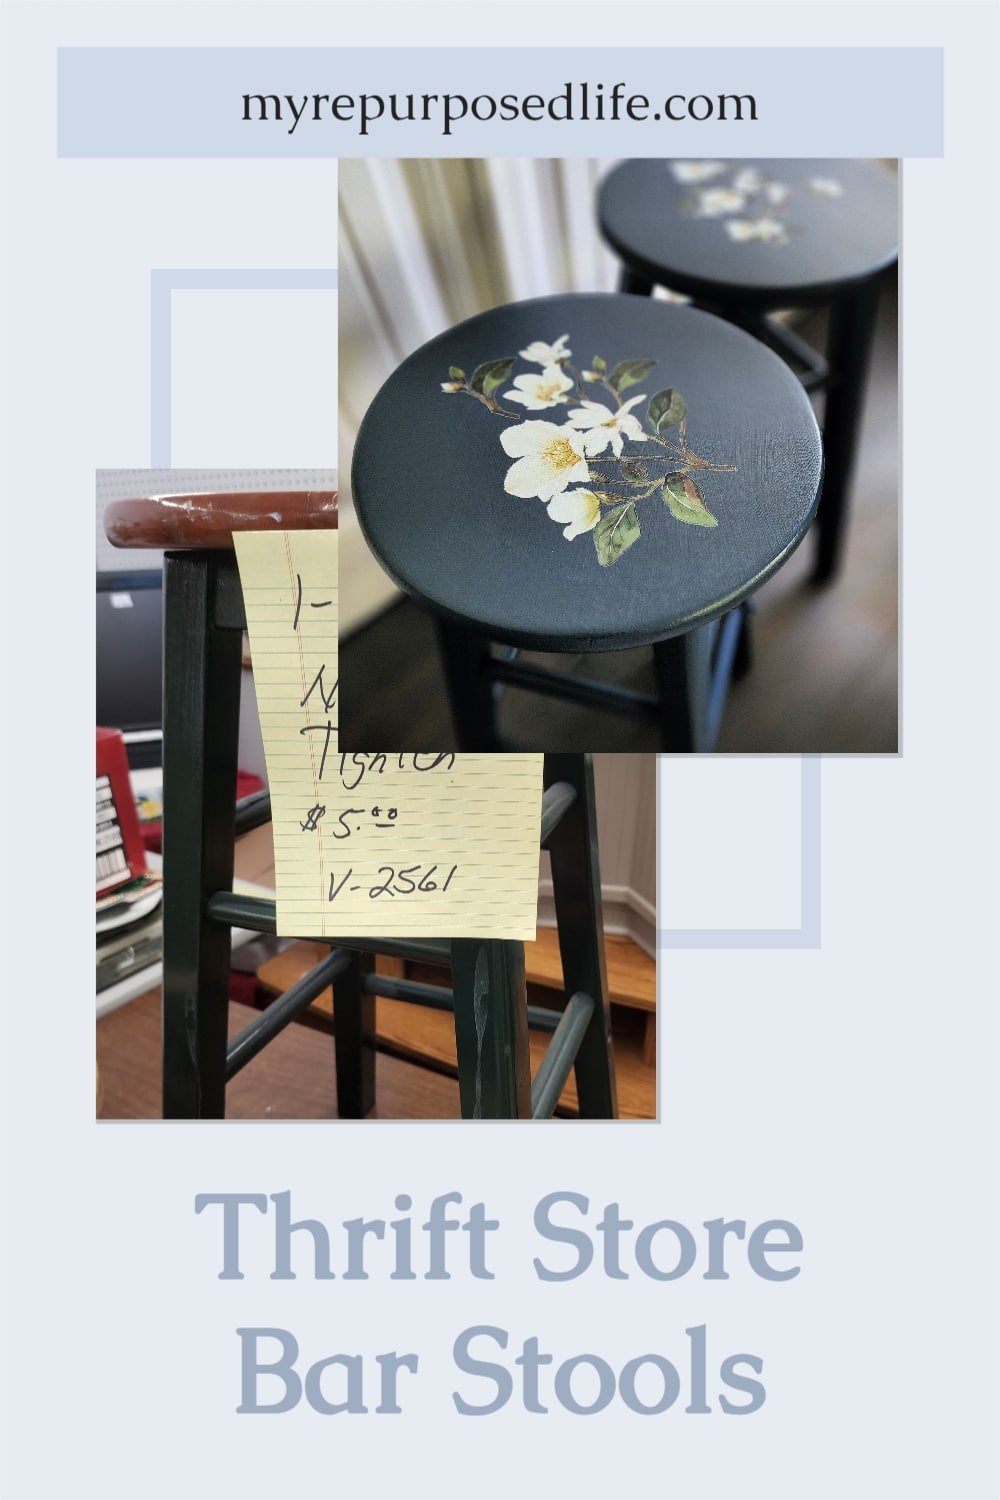
Yep, the bar stools were $5 each, but the booth was having a 50% off sale. When I picked them up, I was shocked at how wobbly they were. I almost changed my mind. However, even if I had to part them out, they were worth five dollars.
Make Repairs & Tighten Screws
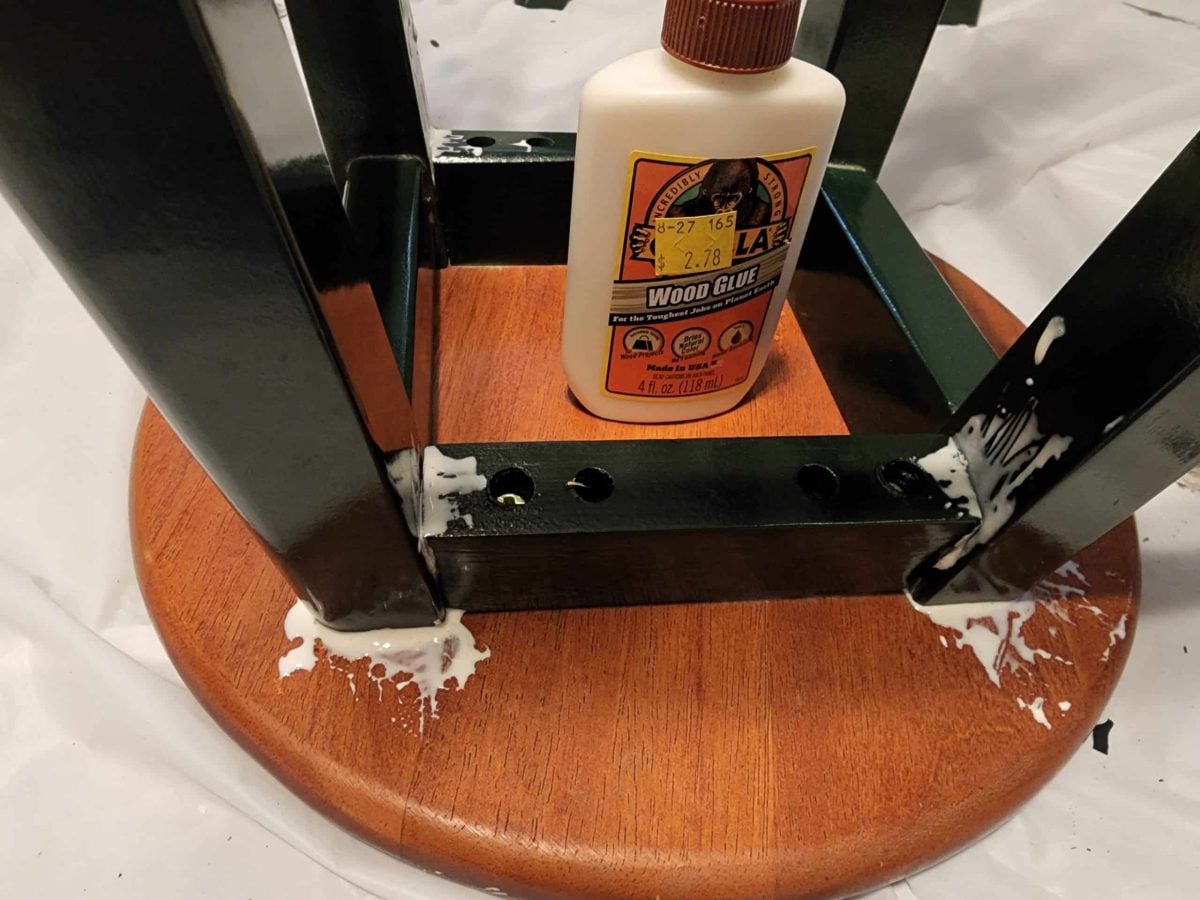
First, I loosened one side, applied Gorilla Wood Glue, tightened the screws back up, and continued to work my way around both bar stools. I sort of liked the dark green color, but I had my heart set on having navy blue bar stools. It’s the same color I used to update my tall chest made from a desk.
Degloss & Clean Project
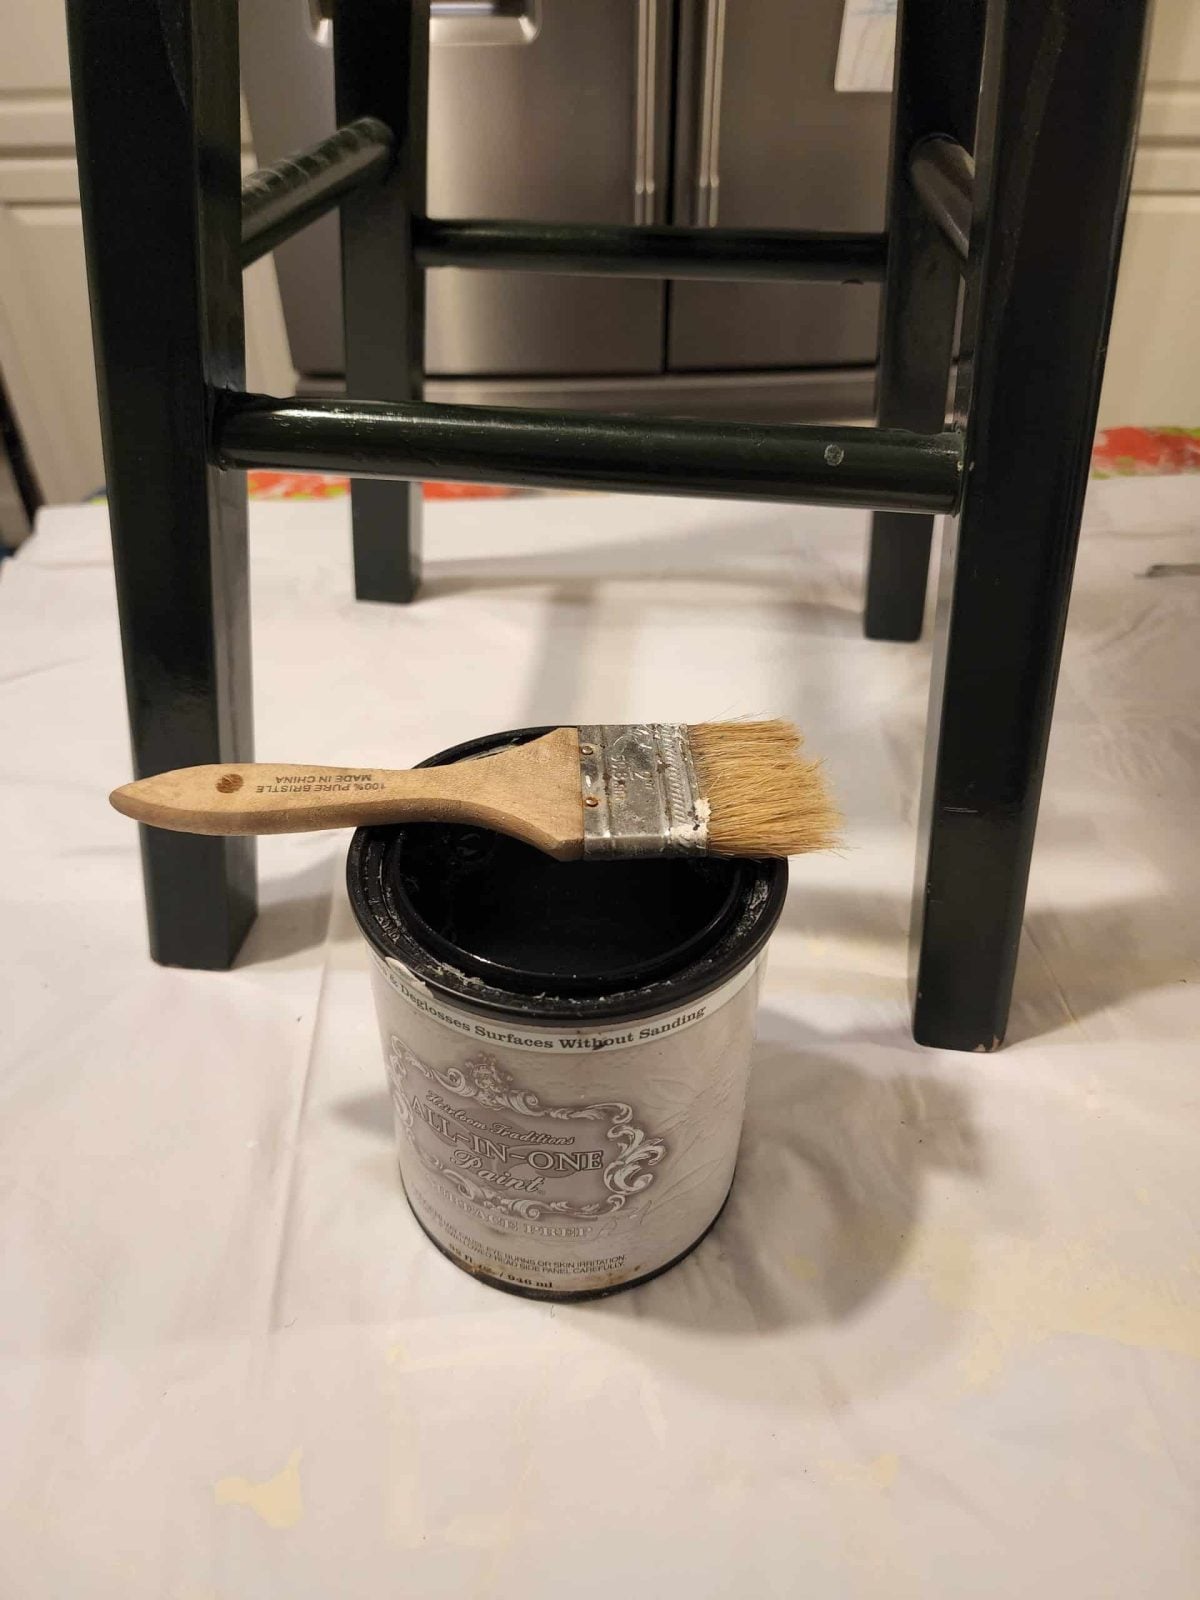
I used All in One Paint Surface Prep to clean and degloss the bar stools. First, you brush on the cleaner.
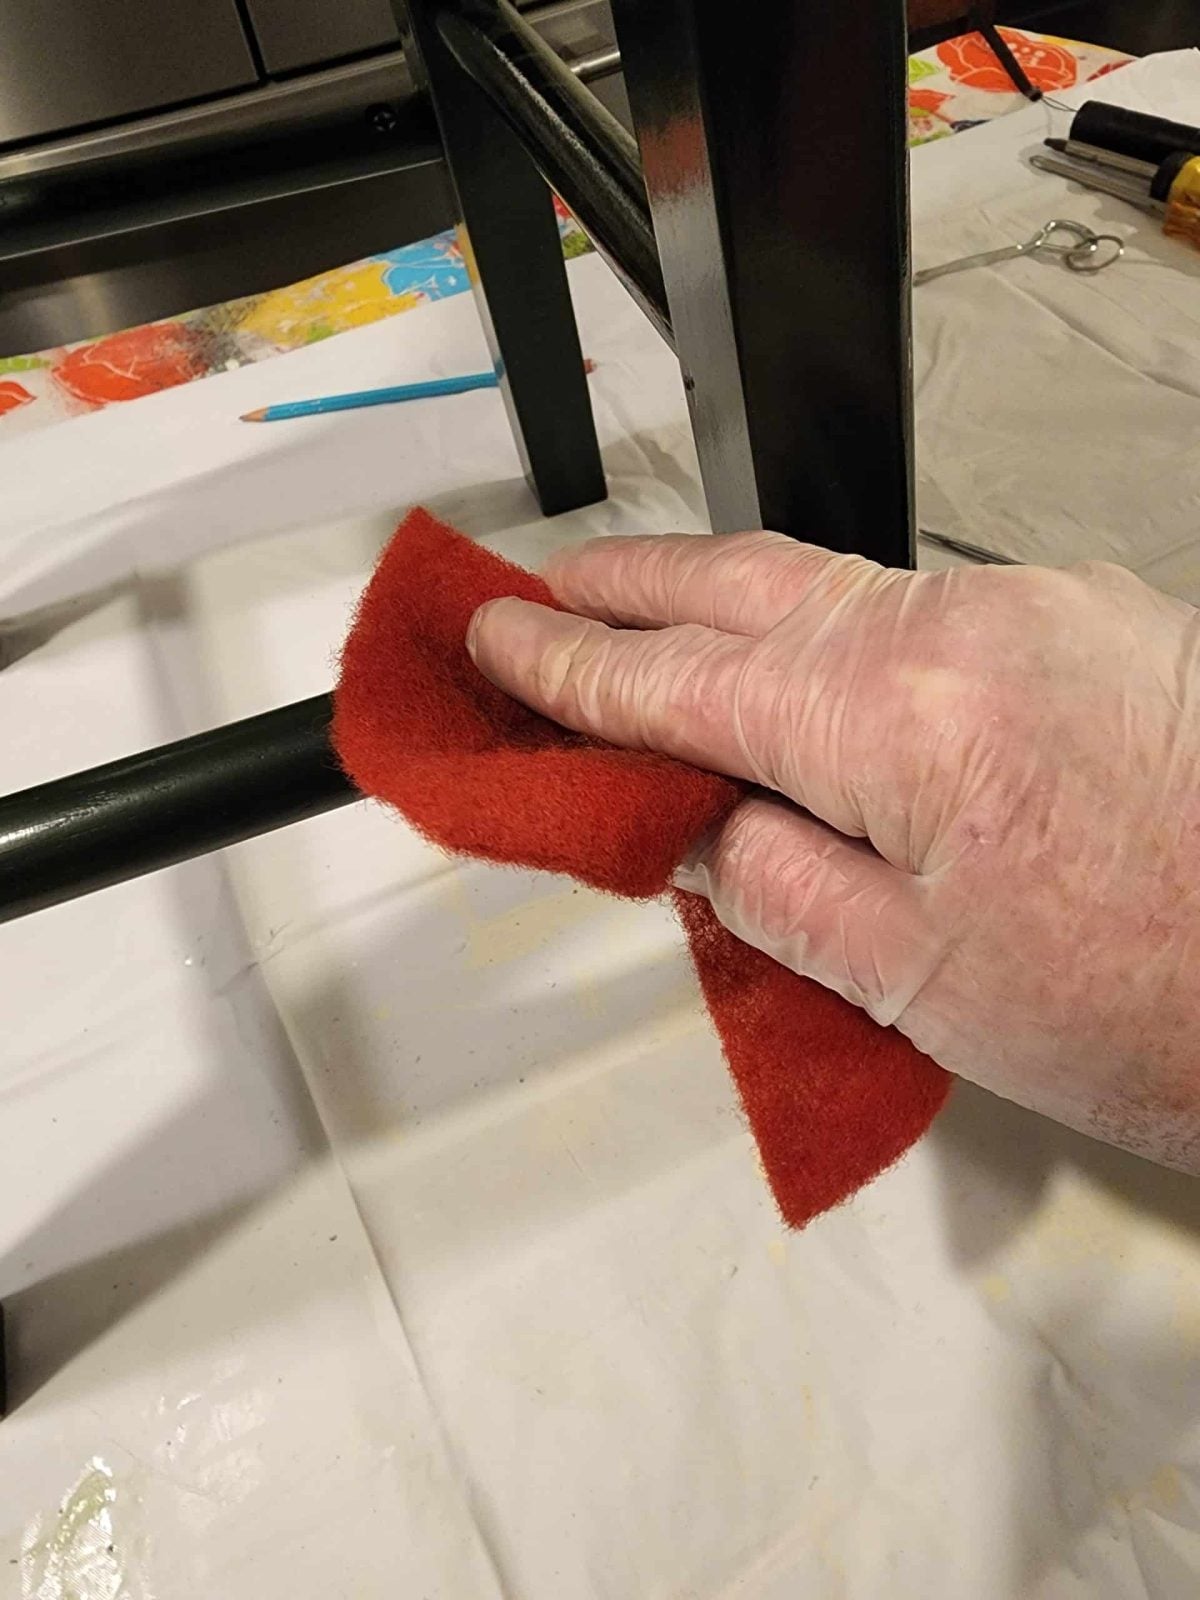
After brushing on the prep, I used a scrubby to rough up the surface. This not only gets rid of grime, but also gives the new paint a nice surface to adhere.
Button Plugs for Furniture Repair

In case you don’t know, sometimes it’s the little things that will push a thrift store makeover up a level. None of the screw holes had button plugs; that was an easy fix.
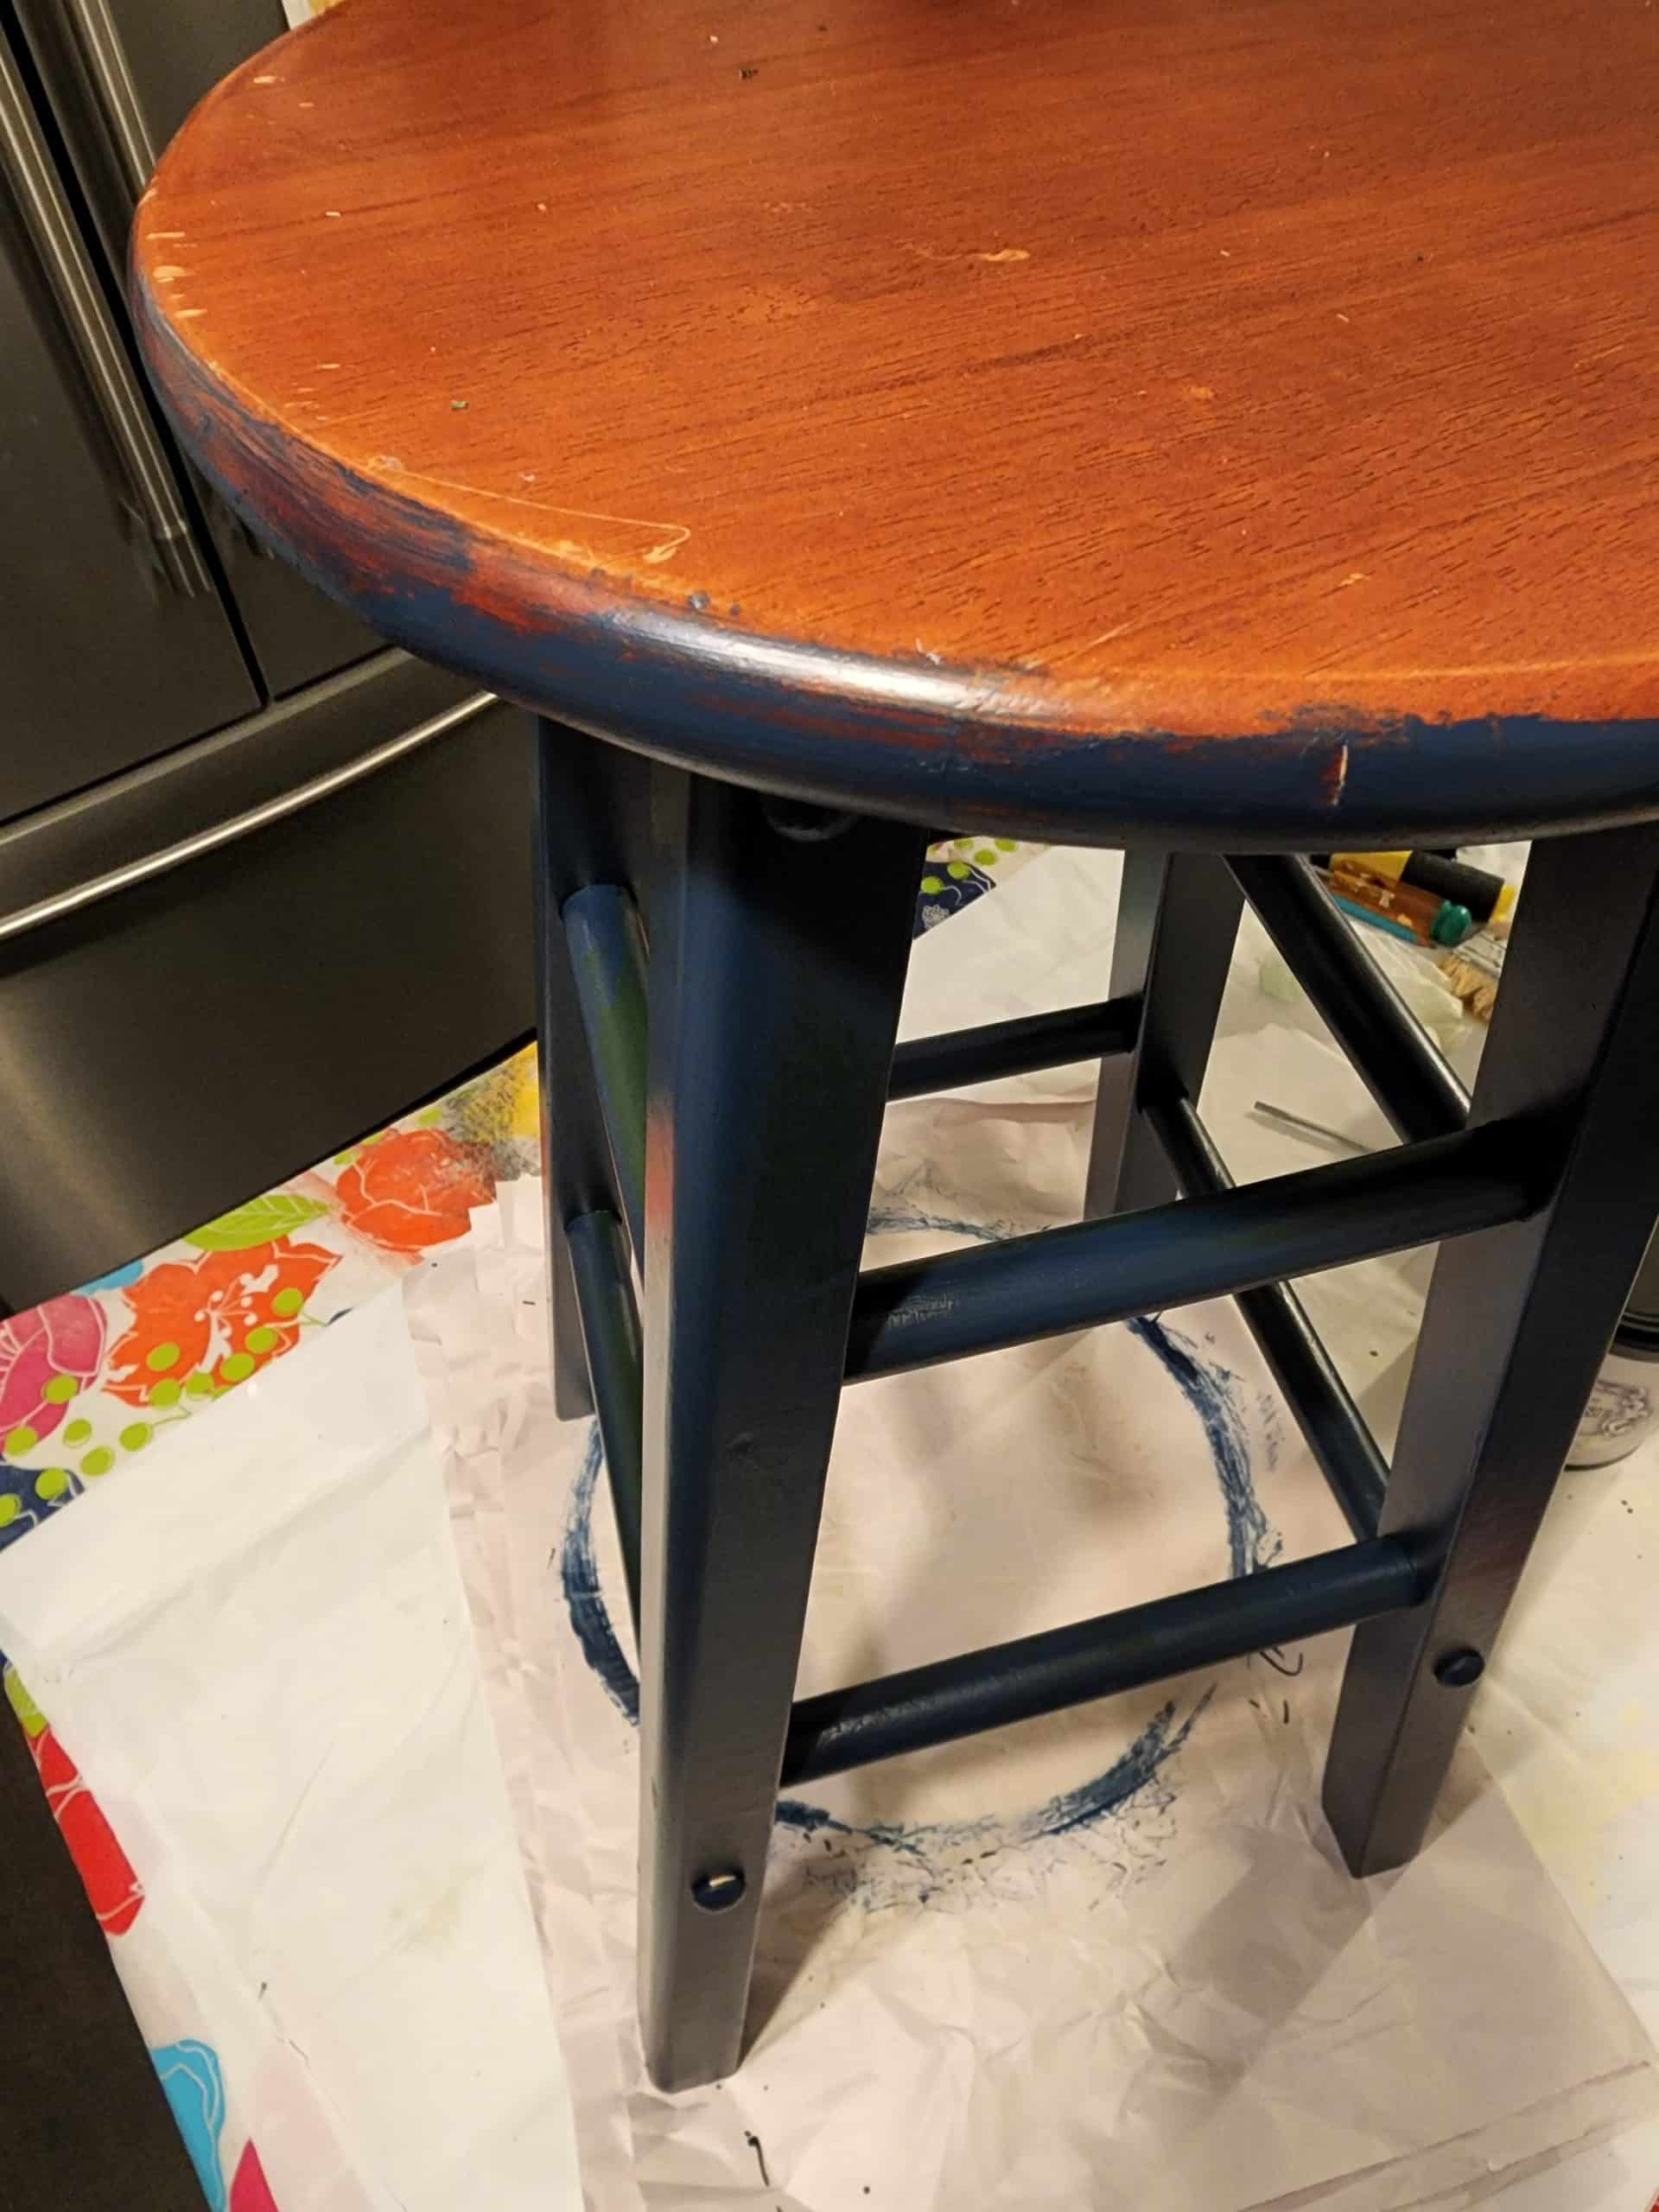
Time to Paint the Navy Bar Stools
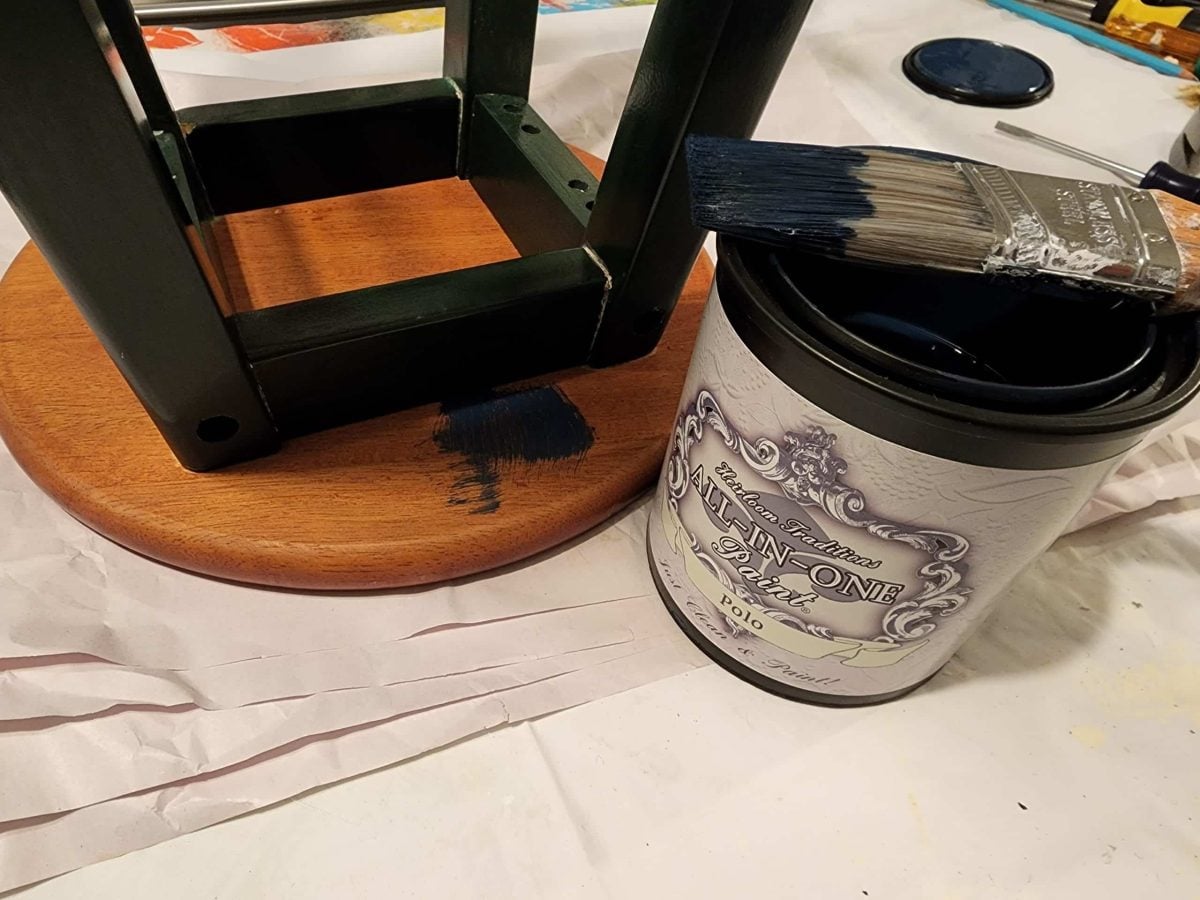
Did you know baby wipes can clean up Gorilla Wood Glue before it dries? As you can see, I left the wood glue alone in the joints, but the rest of it has all been cleaned up. Now the bar stools are ready to be painted. I used the Polo All in One Paint from Heirloom Traditions.
Don’t worry too much about the first coat of paint. Thin coats work best for a very durable chip-free finish.
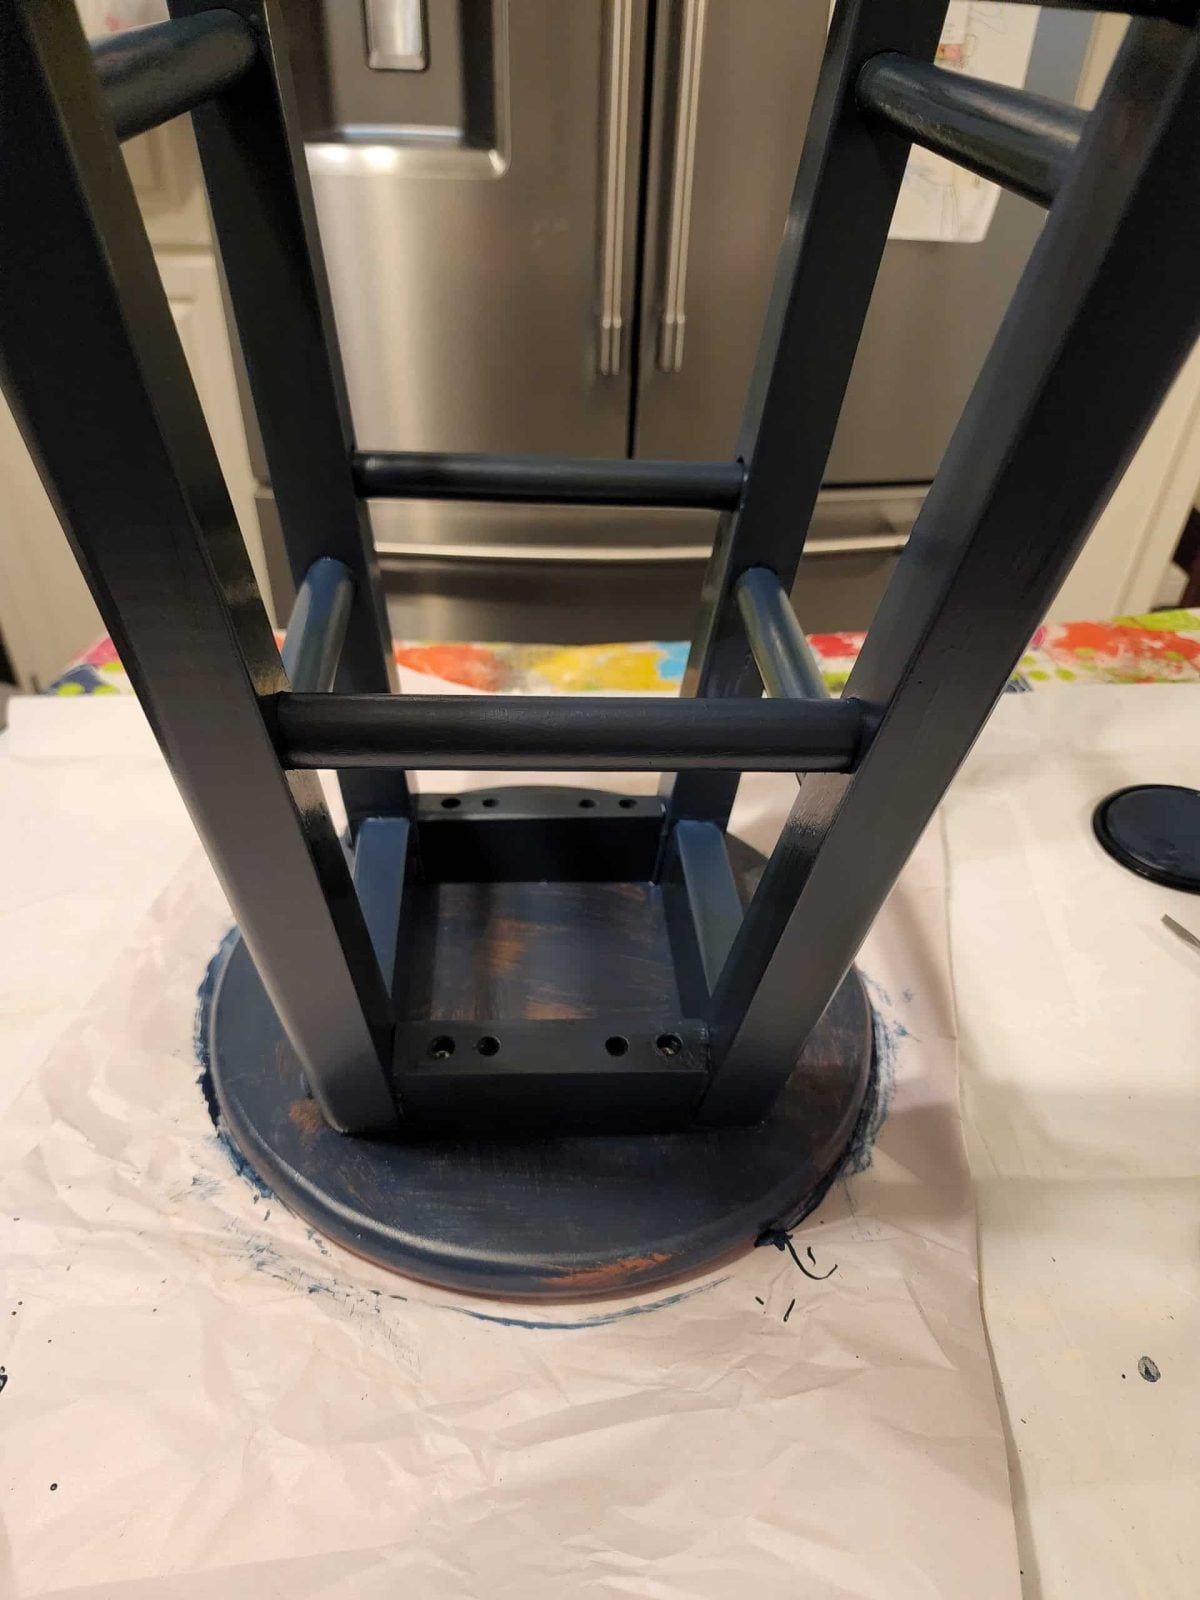
When finished with the underside, flip the navy bar stools upright to make sure you get all the nooks and crannies.
In order to keep the furniture leg from sticking to the drop cloth, I used pieces of waxed paper.
This is where it goes really, really wrong. Sure, I could leave out the decoupage failure, but I hope we can learn something from it.
Related Content: Navy Blue Furniture Projects
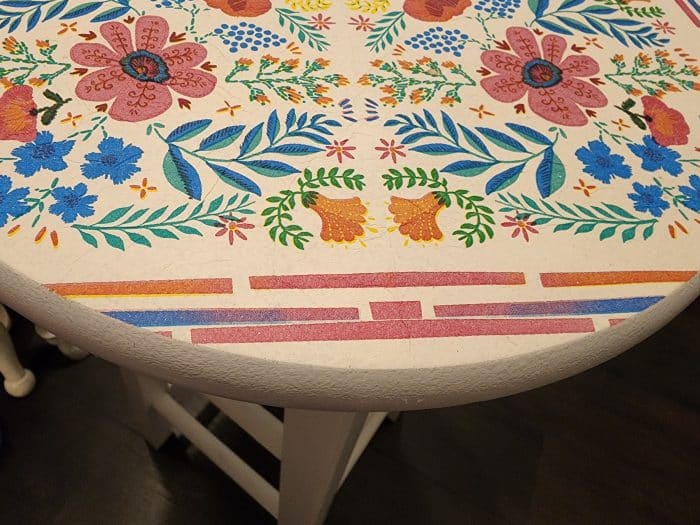
Why Did My Decoupage Fail?
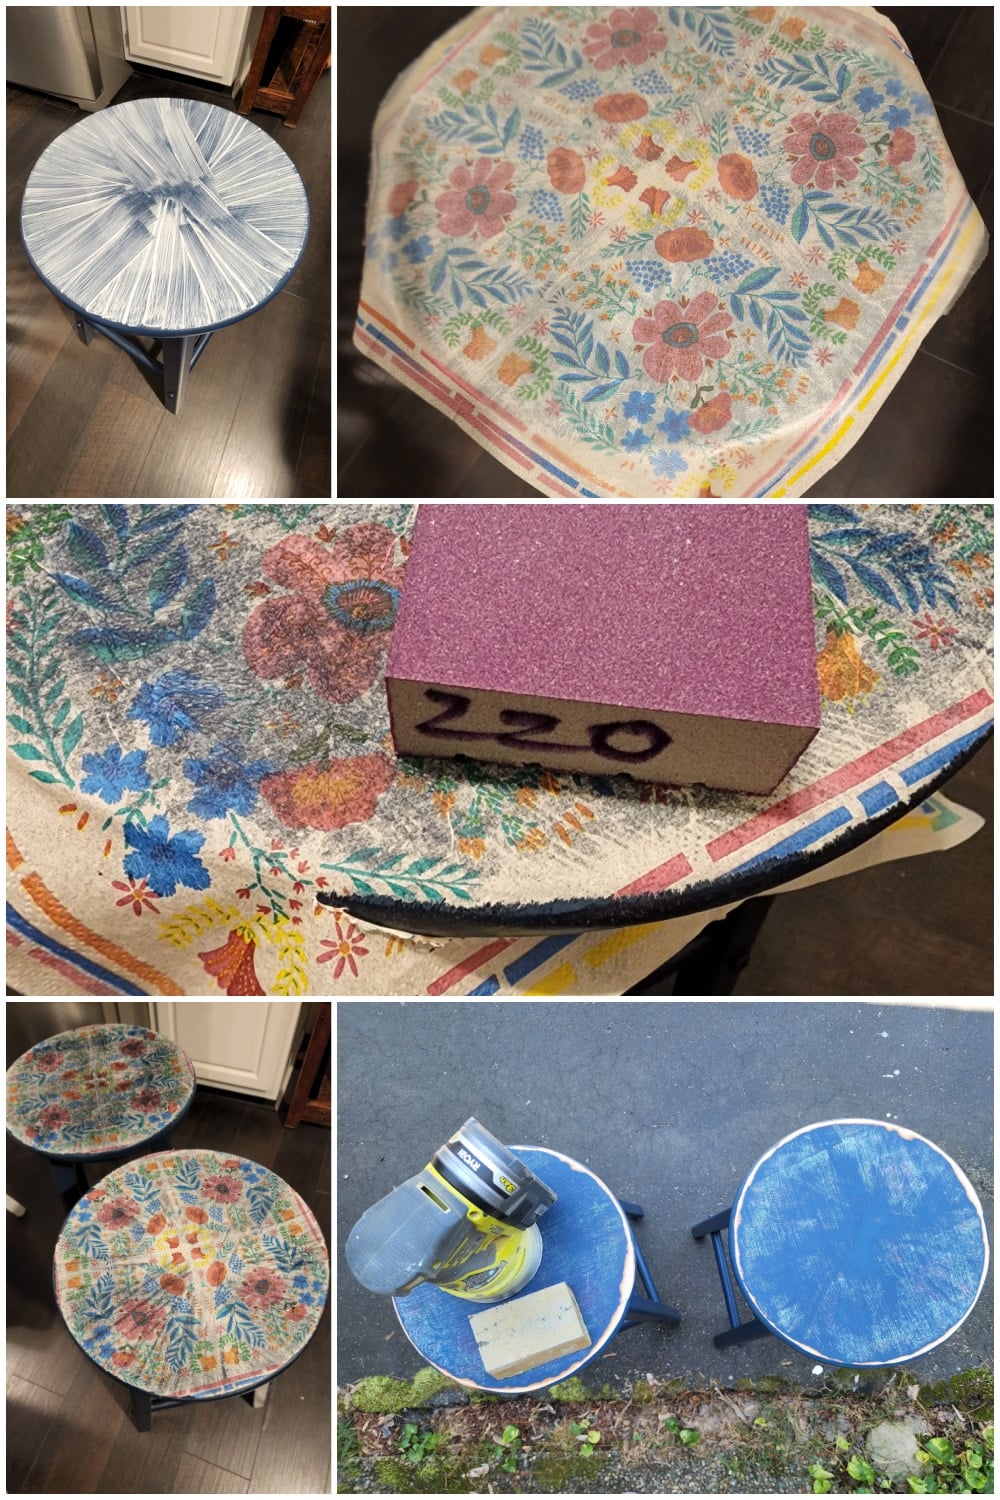
From top left
- Apply Mod Podge
- Smooth out the napkin
- Use a sanding block to remove the edge of the napkin
- Dissatisfied with your project?
- Sand off the napkin decoupage and repaint
Why did the decoupage fail? The best I can figure is that I was putting a dark napkin on a dark surface. What do you think? Oh, and I probably used too much Mod Podge.
I was able to successfully use the boho napkins on another set of bar stools. Tips for NO failure decoupage.
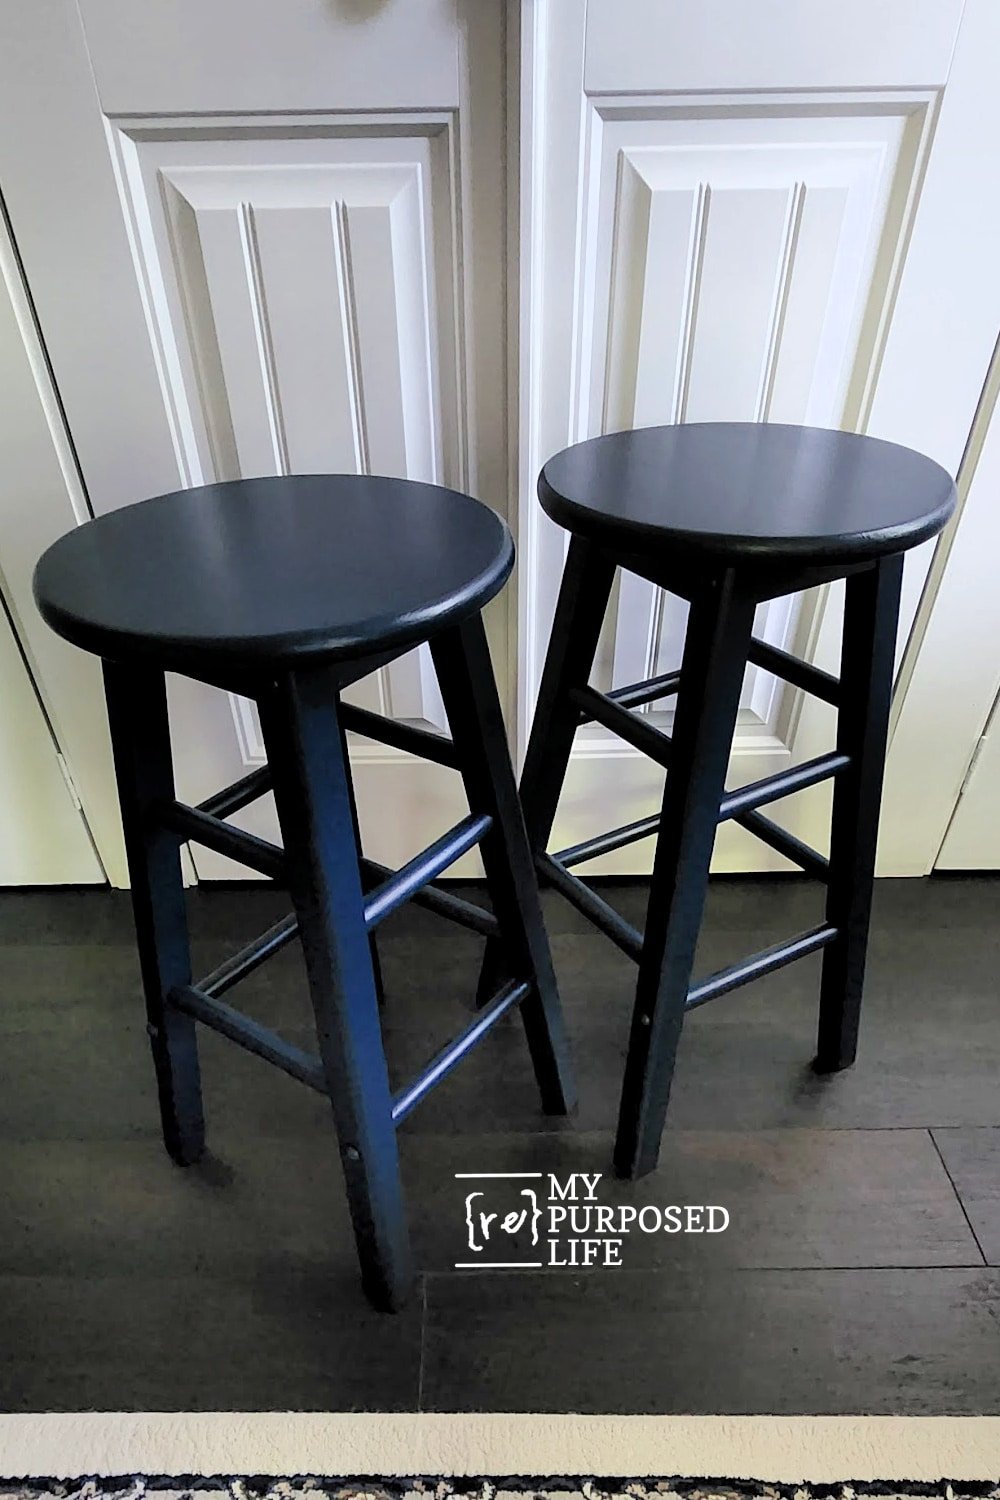
So, now I’m back to square one with two pretty navy blue bar stools. Now what? I had purchased a large Prima Dark Floral Rub-on Transfer on Amazon for the Tall Chest Update, but decided not to use it. So, I searched online for something a little smaller and less intimidating.
Since I love buying my craft supplies online, I searched Amazon and found Prima Mystical Hydrangea and White Magnolia. They were reasonably priced and seemed like the right size for the top of the navy blue bar stools. Not to mention the beautiful design.
Instructions – How to Use a Prima Design Rub-on Transfer?
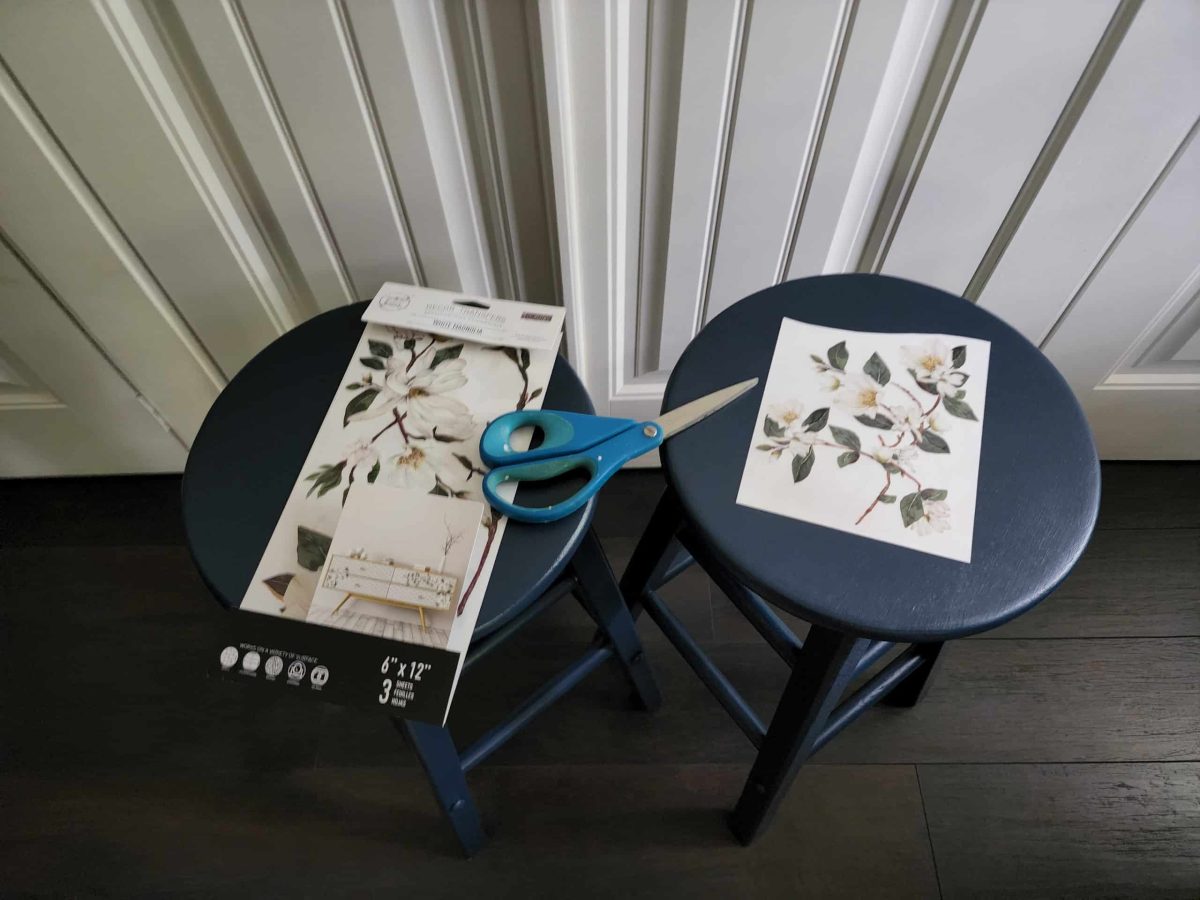
I settled on the White Magnolia and cut the rub-on transfer to size. So, that’s your first step. Choose your transfer and decide which part you actually want to use on your piece of furniture.
Now, I’m ready to start the transfer process. I did this years ago with a very large transfer, and it worked okay, but I needed these rub-ons to apply flawlessly on these beautiful navy bar stools.
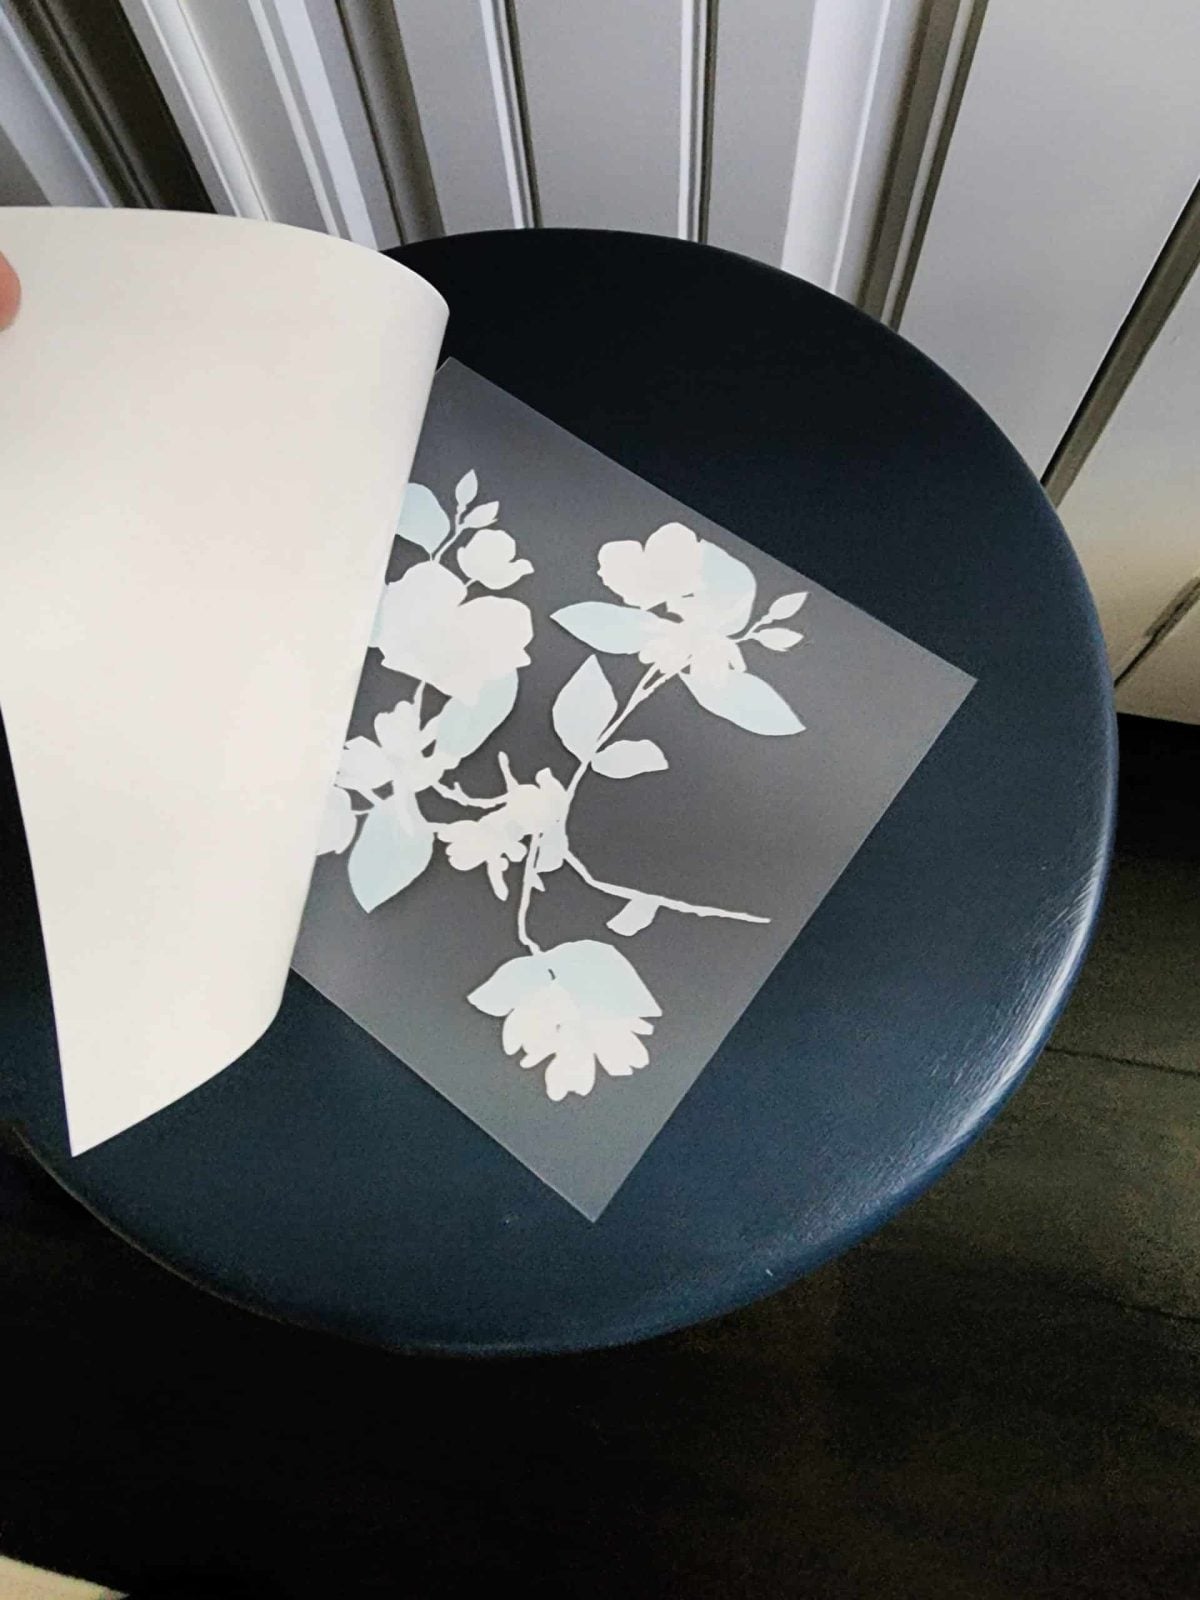
I peeled the backing away from the rub-on transfer so I could do the dry transfer.
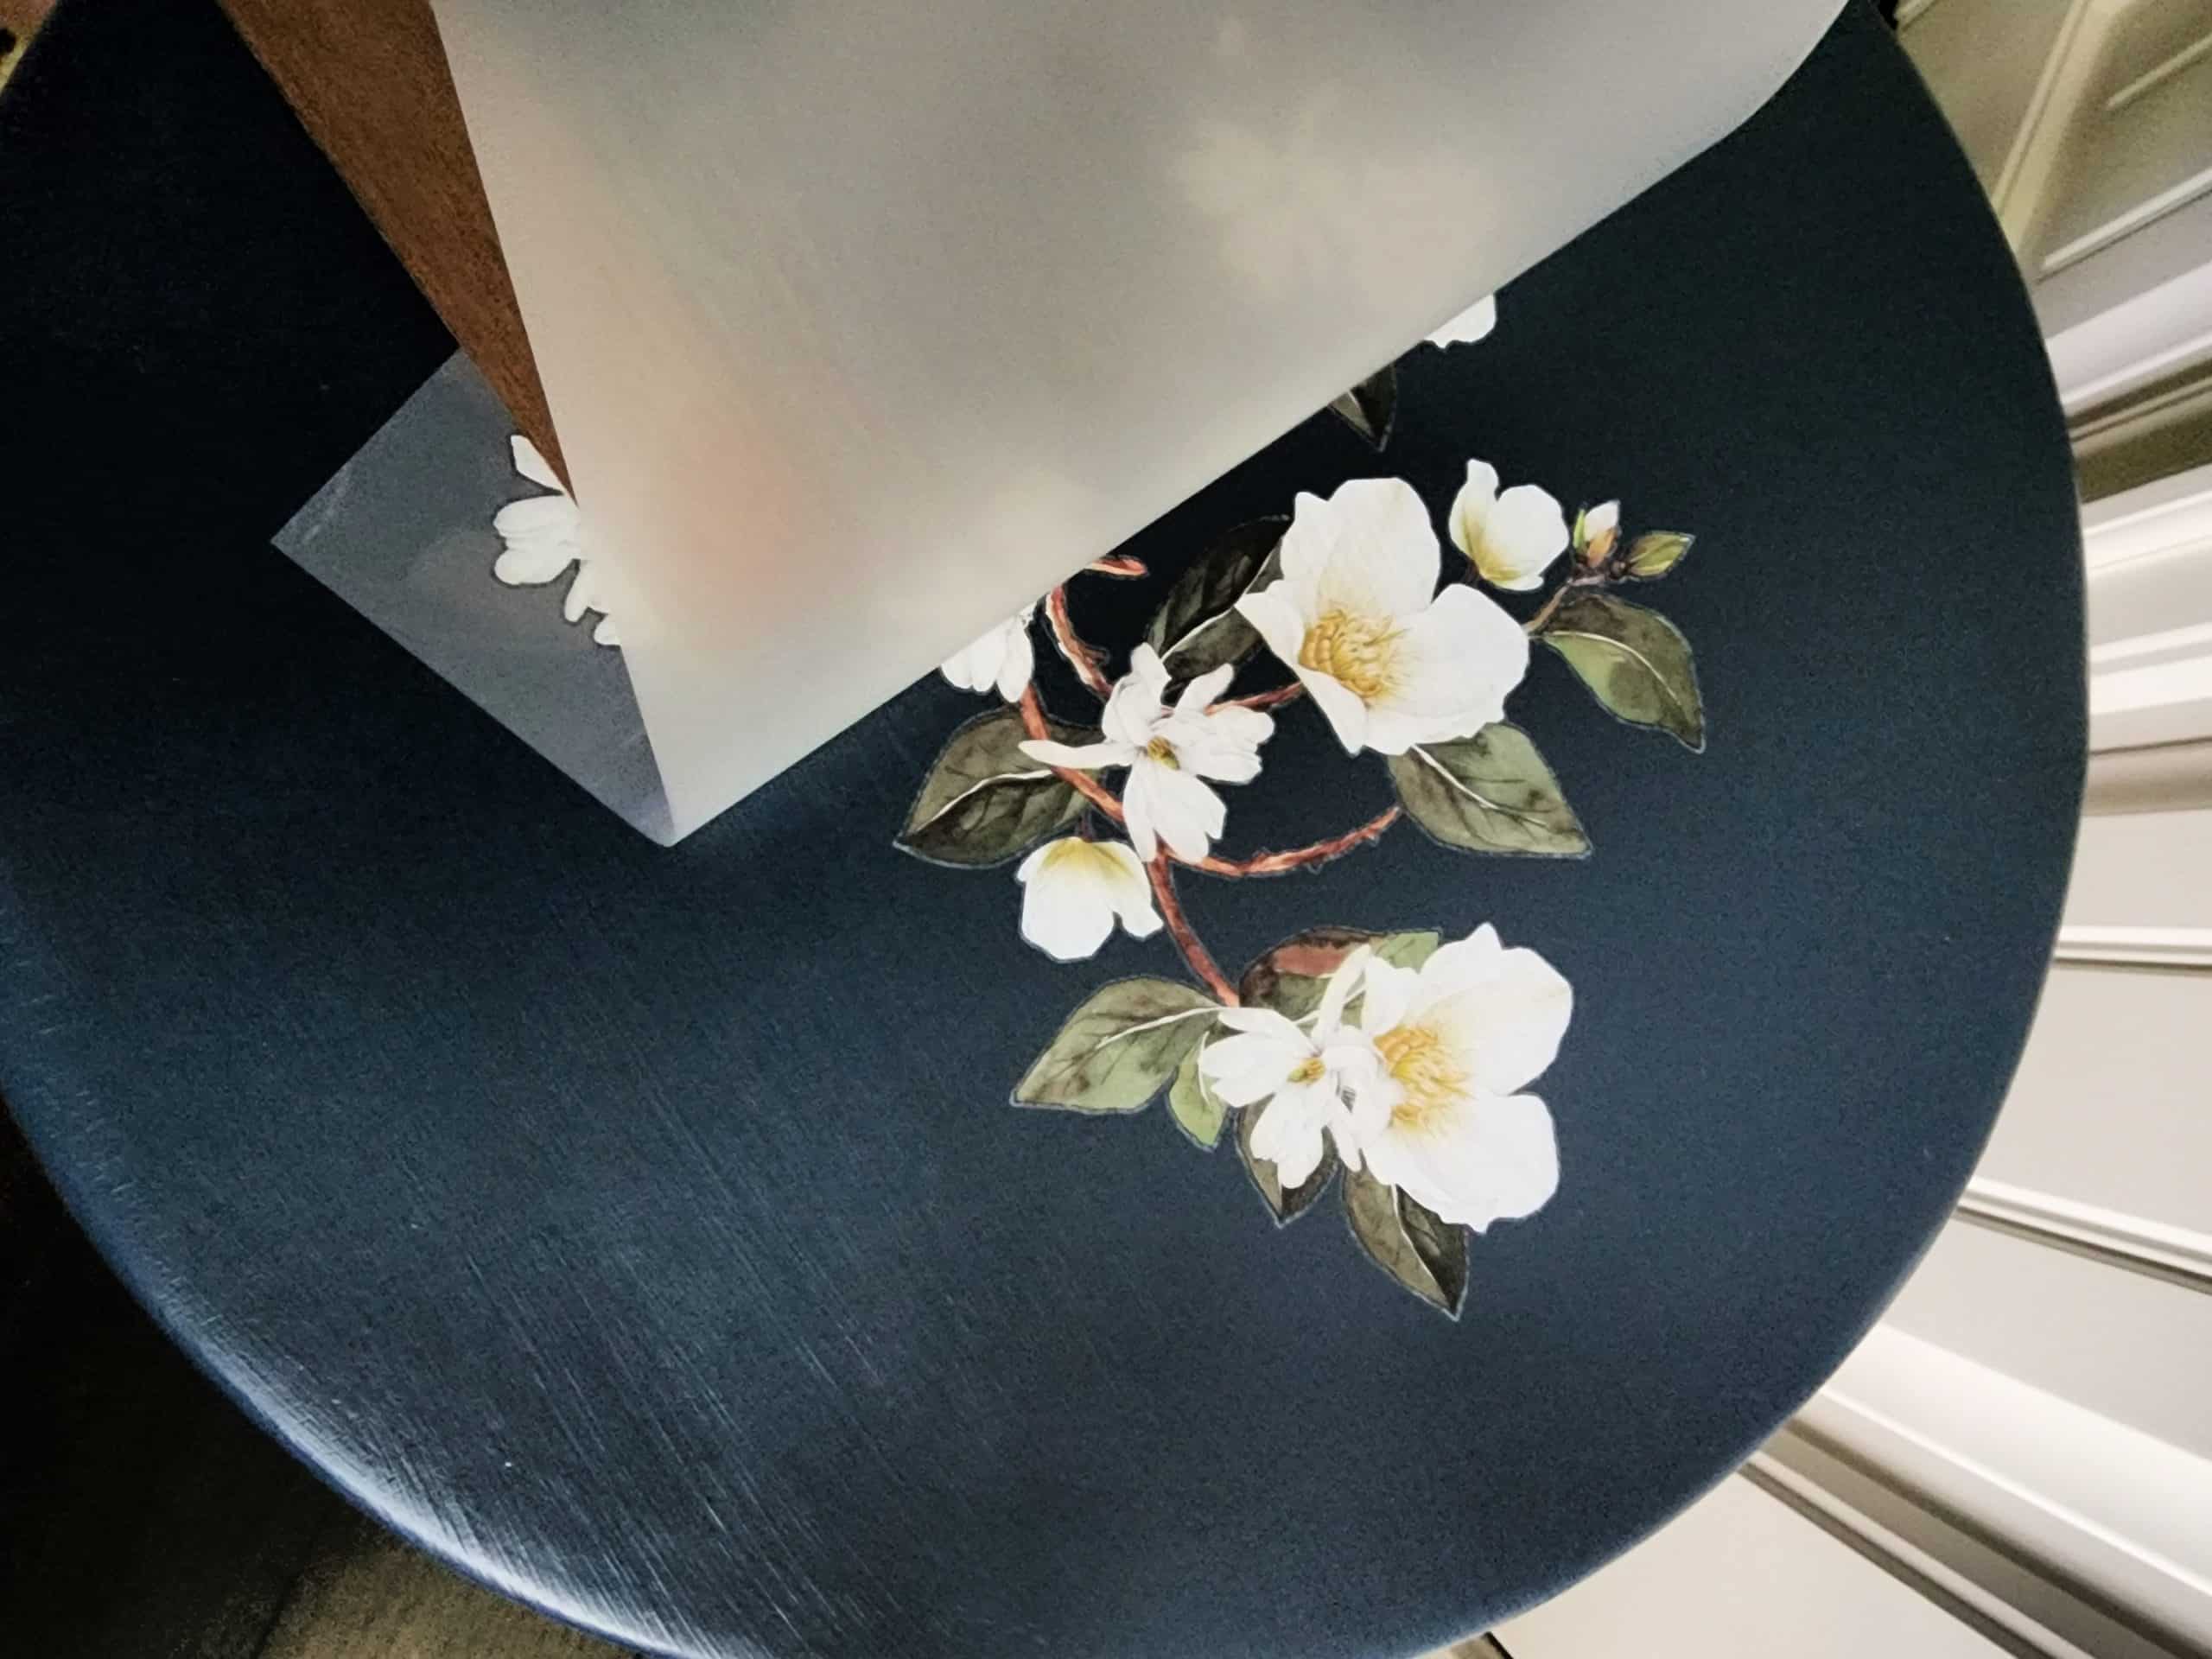
Using a wooden stick that came with the large Dark Floral rub-on transfer, I worked my way across the applique. A popsicle stick came with the White Magnolia furniture decor transfers. Remember, this is a dry rub —no water is necessary. I burnished a little by laying the transfer paper over the rub-on and rubbing it with the wooden stick.
Related Content: Yes, you can use these rub-on transfers on a lamp shade!
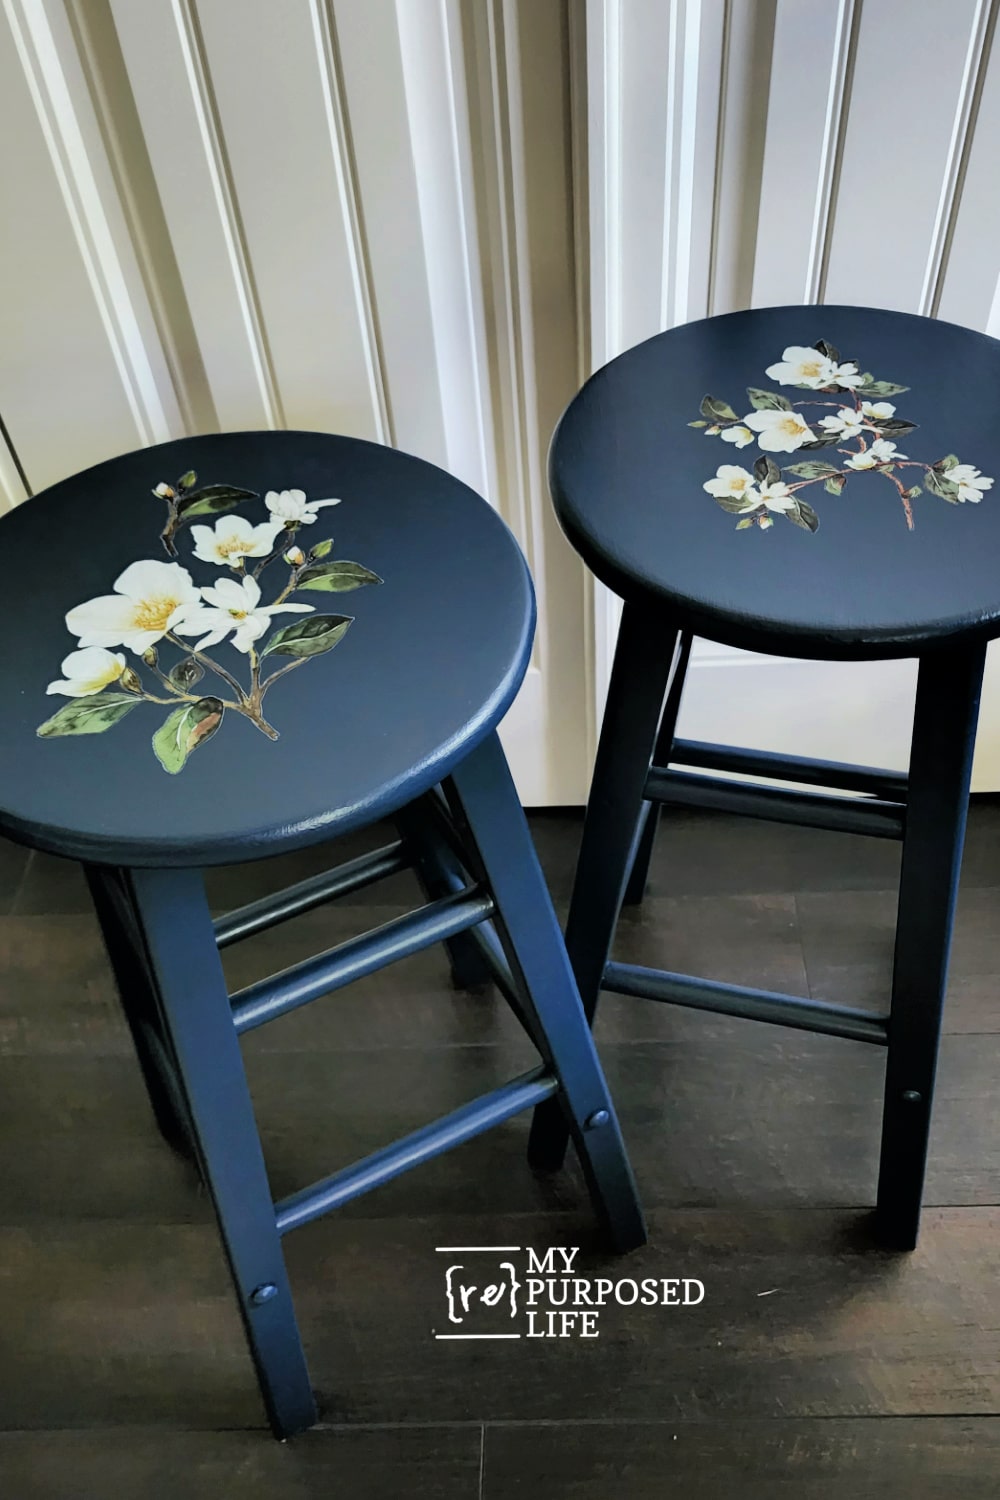
The photos don’t do them justice, honestly! They are beautiful in person! These dry transfer decals are not vinyl; they have such a smooth surface! I think plain bar stools look so much better with embellishments, don’t you?
This navy blue bar stool makeover is a good reminder that every project doesn’t have to go exactly as planned to turn out beautifully. The decoupage idea didn’t work, but the rub-on transfer turned out to be the better choice. Sometimes a thrift store makeover just needs a little patience, a backup plan, and the willingness to keep going until it feels right.
I would love for you to Pin this Rub-on Transfer Project!
Now let’s see the crafts and DIY projects my friends worked on this month. I know you will find lots of inspiration.
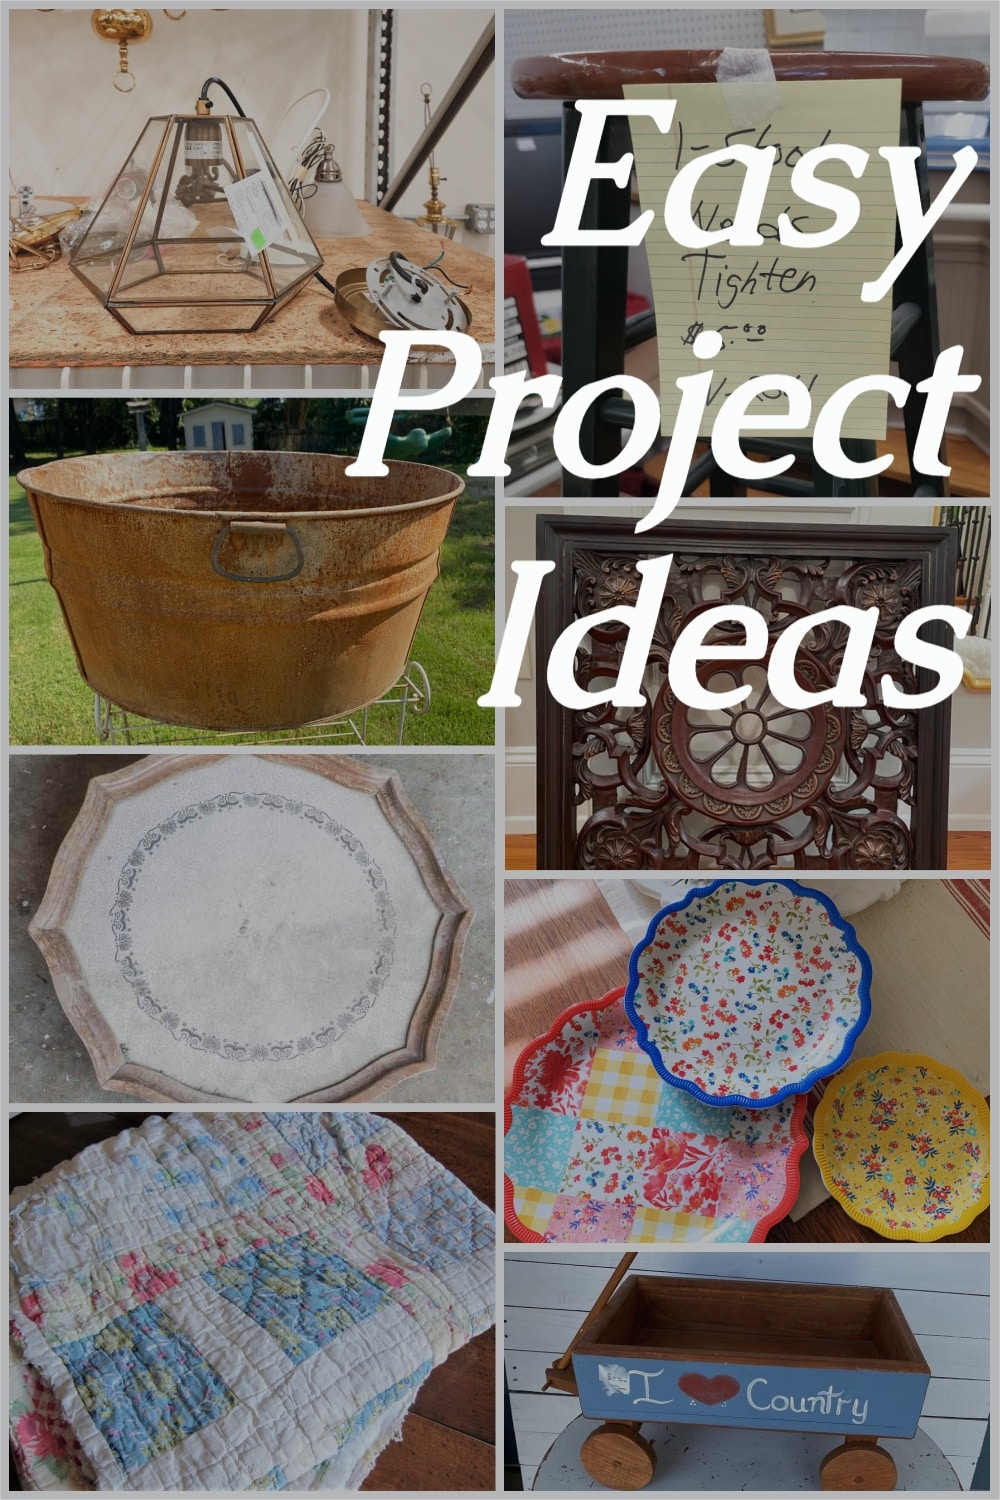
- Plant Cloche from a Geometric Pendant Light
- Navy Blue Bar Stools with Rub-on Transfer (you are here)
- Galvanized Tub Shelves
- Medallion Wall Art Makeover
- 16 Creative Thrift Store Makeover Ideas
- DIY Tiered Tray From Dinner Plates
- Quilt and Pom Pom Fringe DIY Pumpkin
- Goodwill Wooden Wagon Makeover
Gail!! These turned out so gorgeous! Oh my goodness, I need to try out those transfers STAT.
Yep Sarah, in the end, all turned out well! For awhile, I was a little discouraged, but I didn’t give up!
gail
love them! great job: beautiful color, nice transfer.
Thank you Nova, it was a good end to a bad story for sure! 🙂
gail
Love that blue color. I haven’t tried the Prima transfers yet, But I think I’ll head on over to Amazon and pick some up!
Pam,
Thank you! After I painted my tall chest with the polo, I knew I had to use it for these stools. If you use the transfers, you will LOVE them.
gail
Thanks for your honesty here, Gail. So many times we have to make new plans when our original plans don’t work. That’s just the way it is with DIY projects! I actually love your plan B best! Thanks for sharing!
Cindy,
I believe that honesty is always the BEST policy–in real life and online. 🙂 Many times I don’t even have a plan, but seems to never fail that when I do make a plan . . . there’s always a b, or even a plan c. 🙂
gail
These are just beautiful, Gail. You are right, the decoupage doesn’t work well on the dark surface since the paper becomes translucent. I have some similar stools and am so inspired by your work!
Becky,
Ohhh, are you going to paint your bar stools blue? Or another color. I’m sort of having a bar stool summer. They are always catching my eye at the thrift store.
Thanks for your sweet comment.
gail
Beautiful! What can be used over the transfer to seal it and make the decal last longer? Thanks, Monica
Thank you so much Monica!!
I need to update the post I used spray clear sealer. (Rustoleum)
Gail
l just love the small transfers! Perfect for your stools!
Thank you Carlene!! So much better than the decoupage failure!
Gail
What a great transformation! I really need to try my hand at those transfers. They look so simple and are so pretty!!! Beautiful makeover!
Thanks Christy! You definitely should try the rub on transfers. So so easy!
Gail
Greetings Gail. I think you were spot on using the beautiful decals over luscious navy paint. I like how you pay attention to detail in repairing the stools first. A job well done and they look fantastic to boot!!
Donna, those sad stools needed another chance! They’re a little smaller than most bar stools. I wish I needed them, but alas they are at my booth waiting for a new home.
Gail