
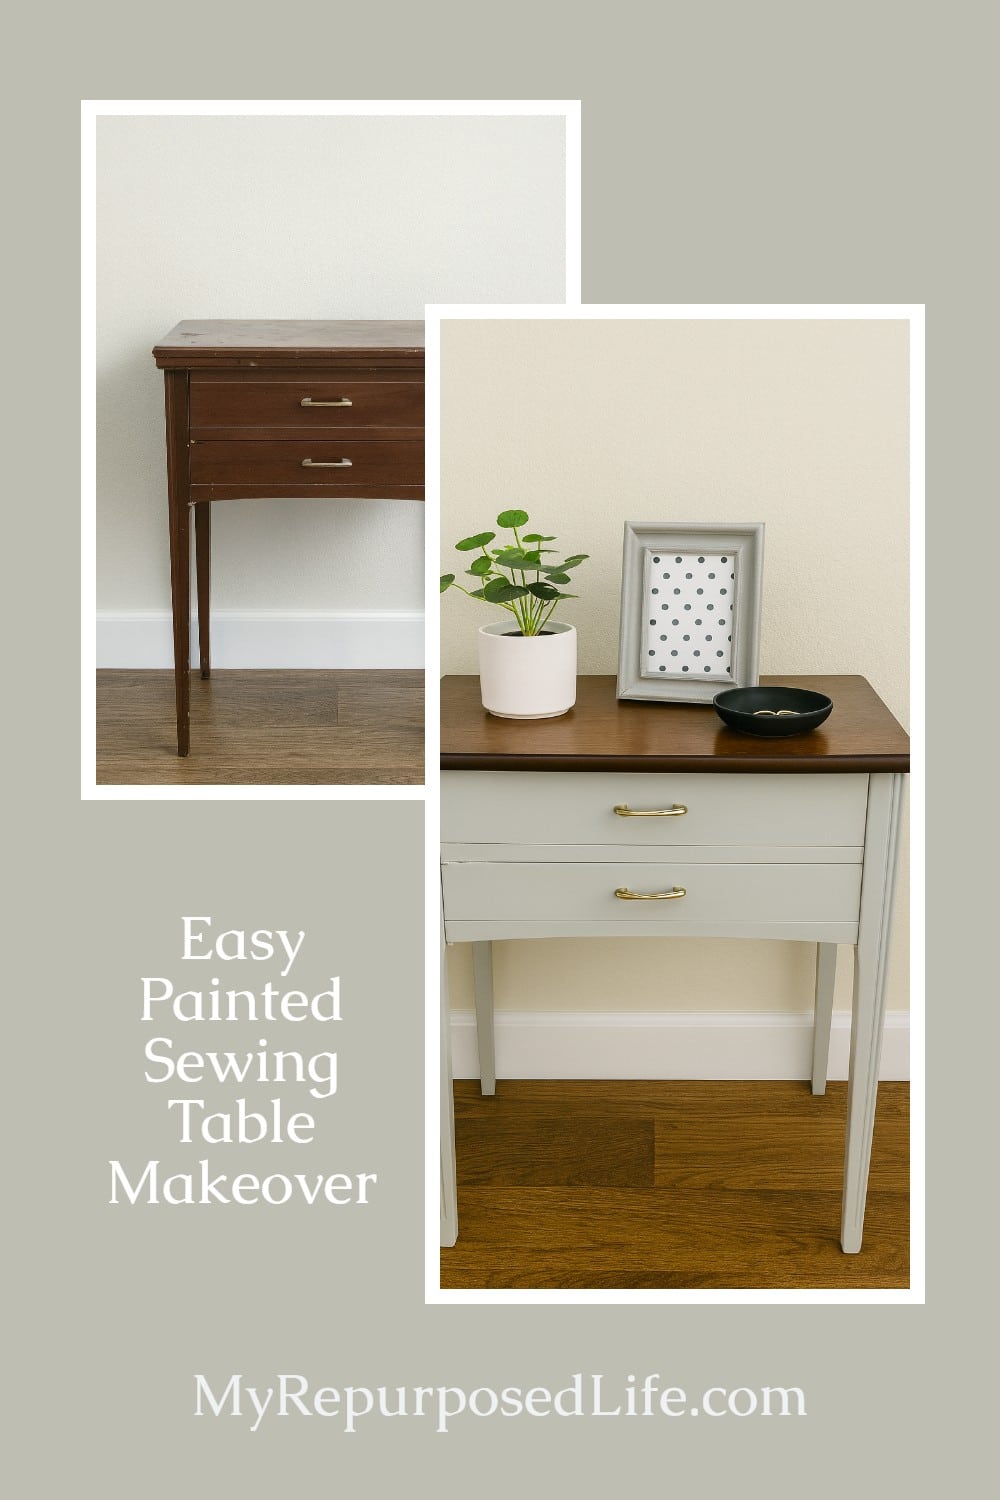
Easy Painted Sewing Table Makeover
As an Amazon Associate, I earn from qualifying purchases.
This easy painted sewing table makeover proves that even the most tired furniture can be beautiful again. The original finish was scratched, dull, and marked with years of use, but a little paint and gel stain completely changed its look. With a light green base, dark walnut top, and refreshed handles, this small table now has the perfect blend of charm and function.
Painted Sewing Table Before
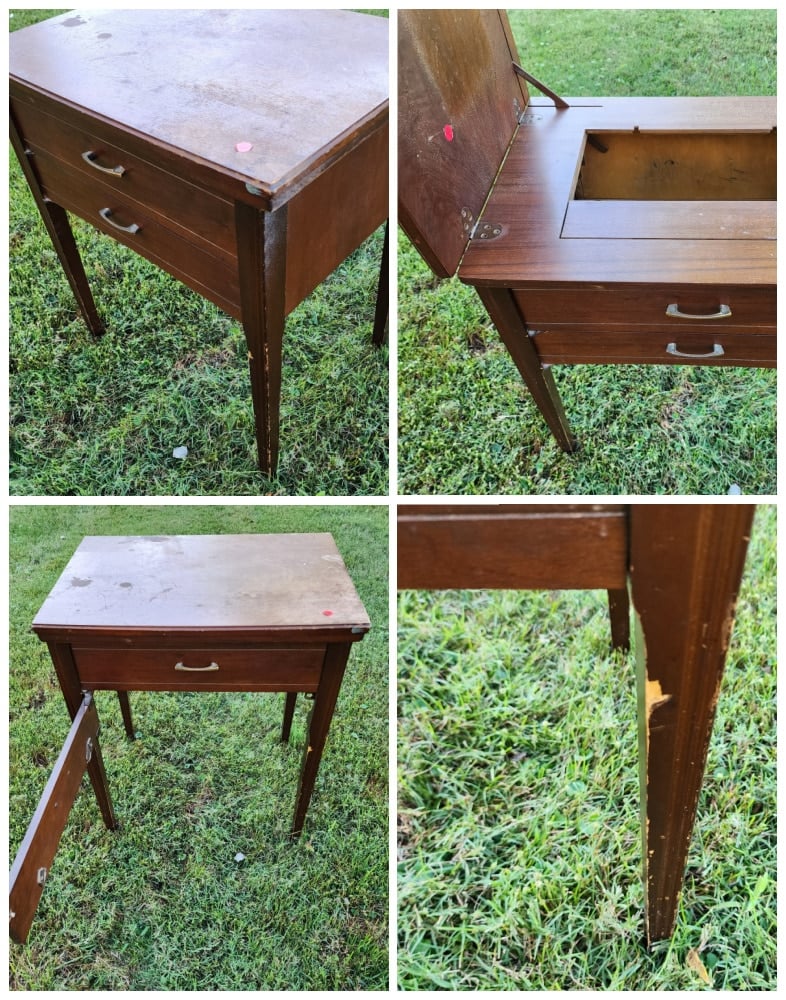
While thrift shopping with a friend, I saw this $4 sewing cabinet. I lifted on the edge to see if it still had the sewing machine left inside-it did. So I walked on by. A few days later, while I was out of town, my friend texted to say it was 50% off and the machine had been removed. Later that week, when I got home, the sewing cabinet was on my patio. I’ve always loved rescuing old furniture and giving it a new purpose.

It’s Furniture Fixer Upper Tour Day! Be sure to visit my friends’ projects at the bottom of this post.
Why This is the Easiest Sewing Cabinet Project Ever
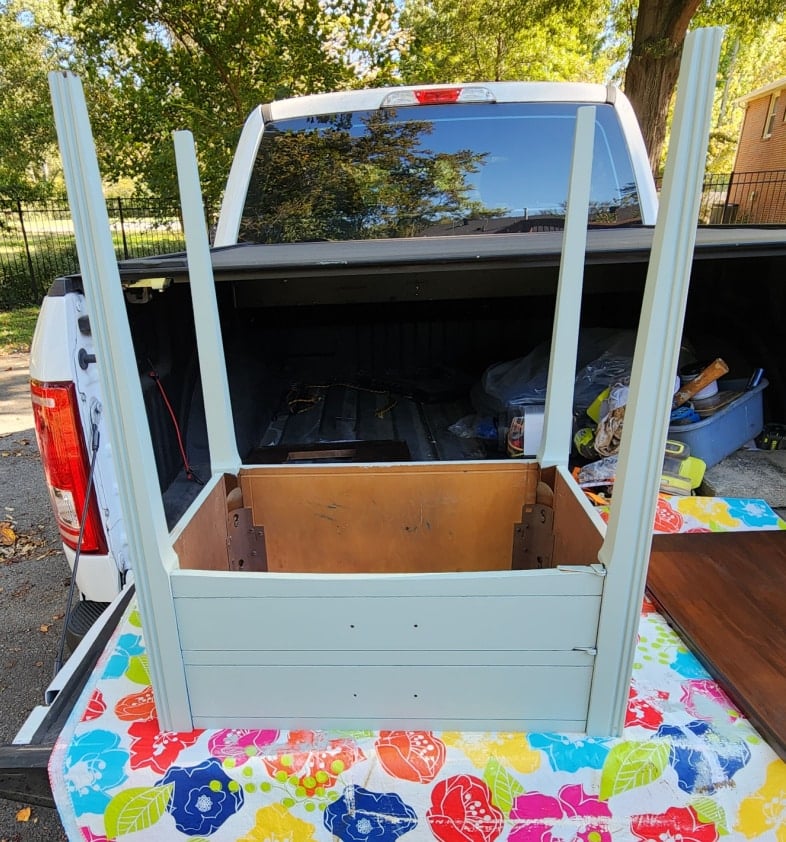
You will see that most of the work done on this project takes place on the tailgate of my pickup truck. I was out of town at my daughter’s house to dog-sit. Before I left, I grabbed a selection of tools I felt I would need to complete this project. One of those tools was my Kreg Jig. I assumed that I would have to reattach the top with pocket holes.
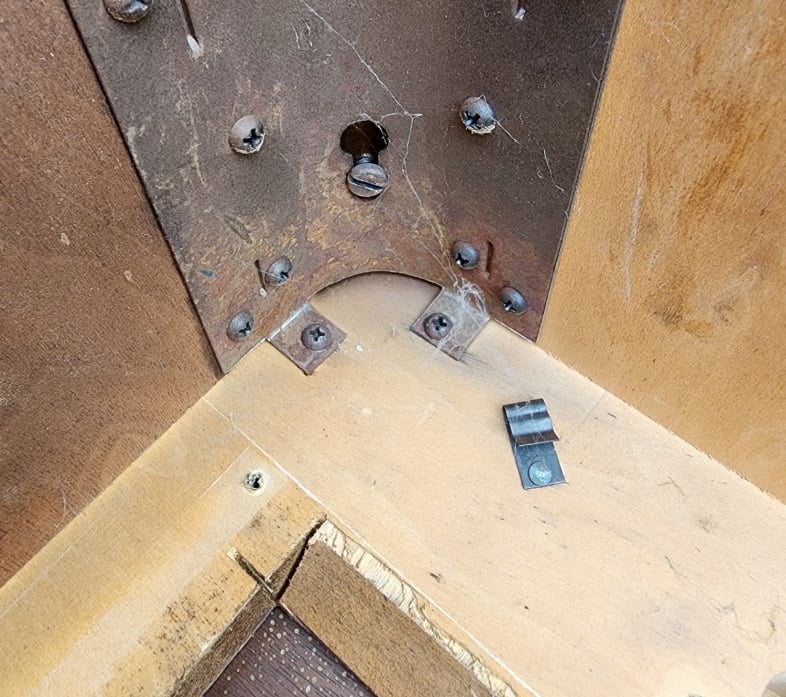
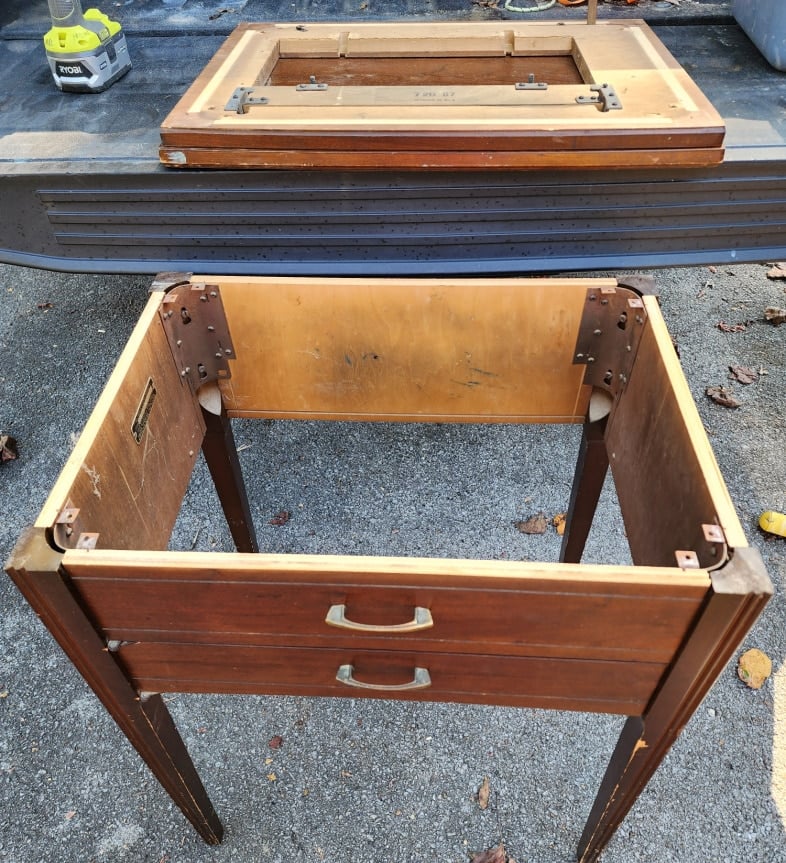
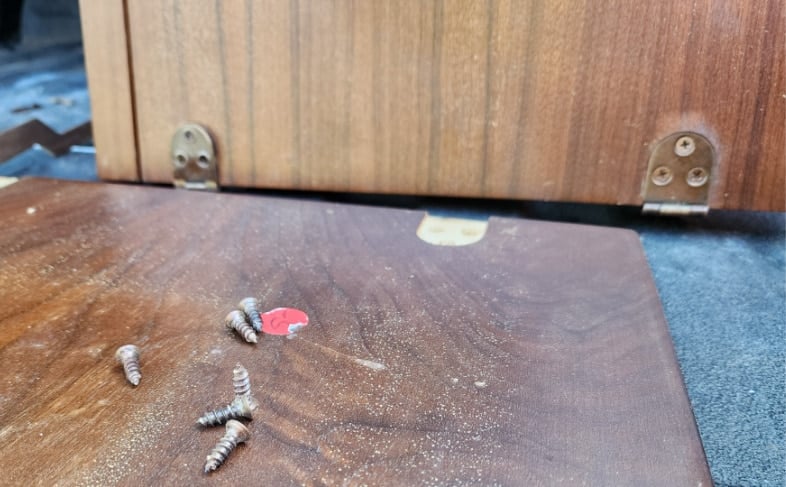
Imagine my surprise when I flipped the cabinet over and found these metal leg brackets that have screws holding on the machine mounting board! To remove the board, I needed to take out seven screws.
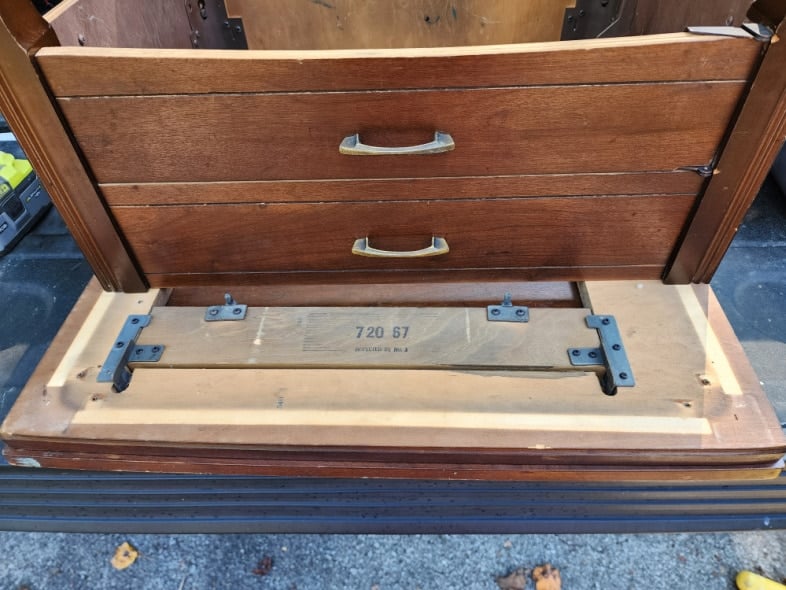
The cabinet was separated in only a few minutes.
See those small brackets? That means that it will be so incredibly easy to reattach the original lid.
Dismantle a Few of the Parts
You can see that someone tried to sell the sewing machine at a yard sale for $5 before donating it to the thrift store. I removed the screws from the hinges on the lid, which will become the new tabletop.
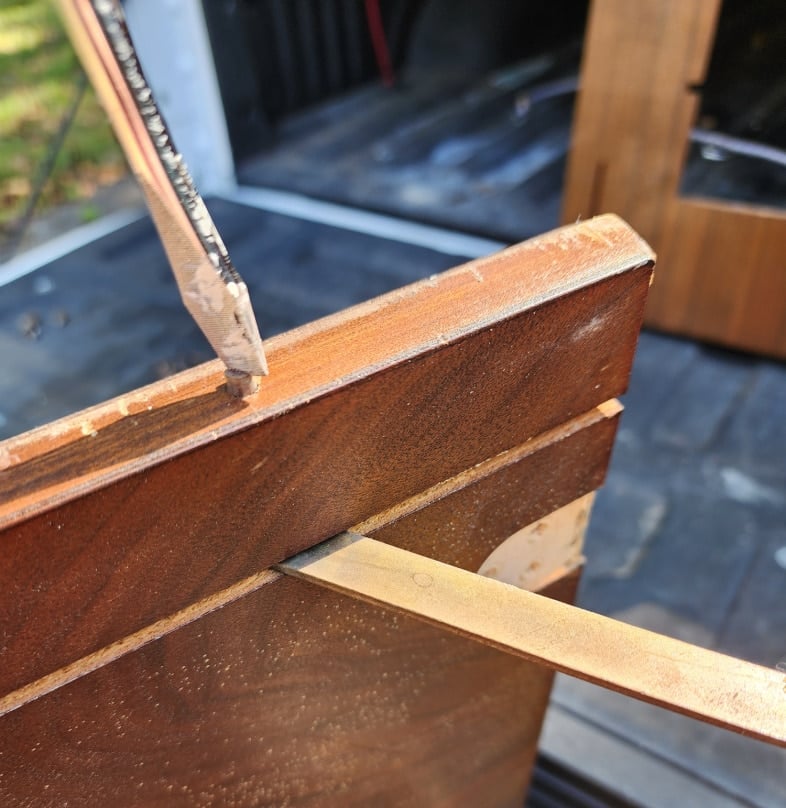
I removed the metal lid support bar that kept the top from opening too far. The first time I did this, kind of demolition, I missed the tiny screw that holds the support bar in place.
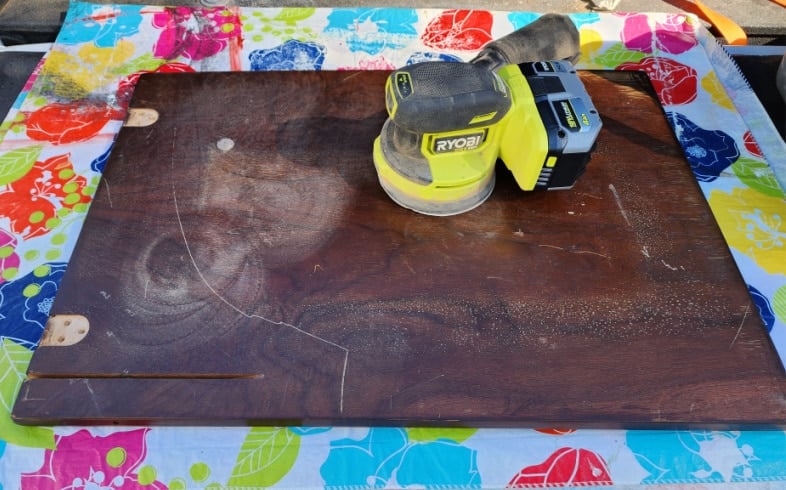
Sand the Blemishes on the Lid (Tabletop)

I used an orbital sander to smooth the top and remove scratches.
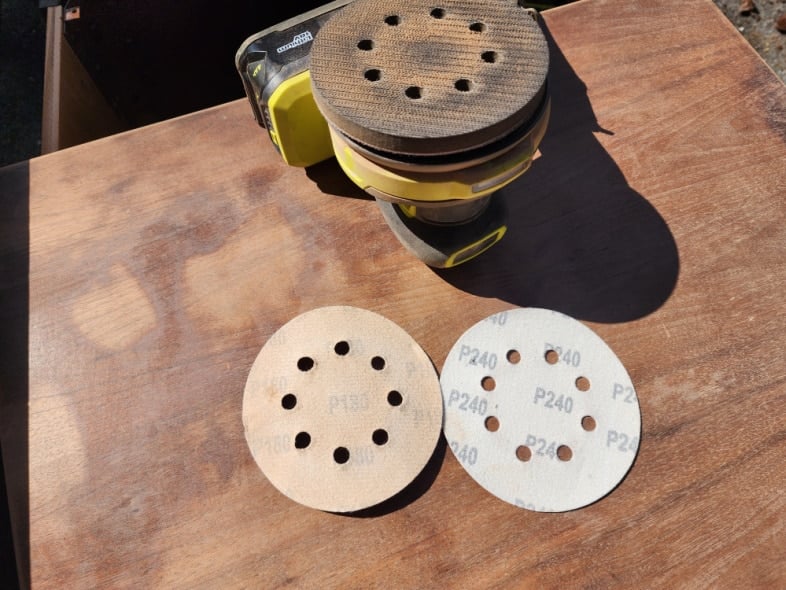
I began sanding with a 180-grit, and finished with a 240-grit sanding disc.
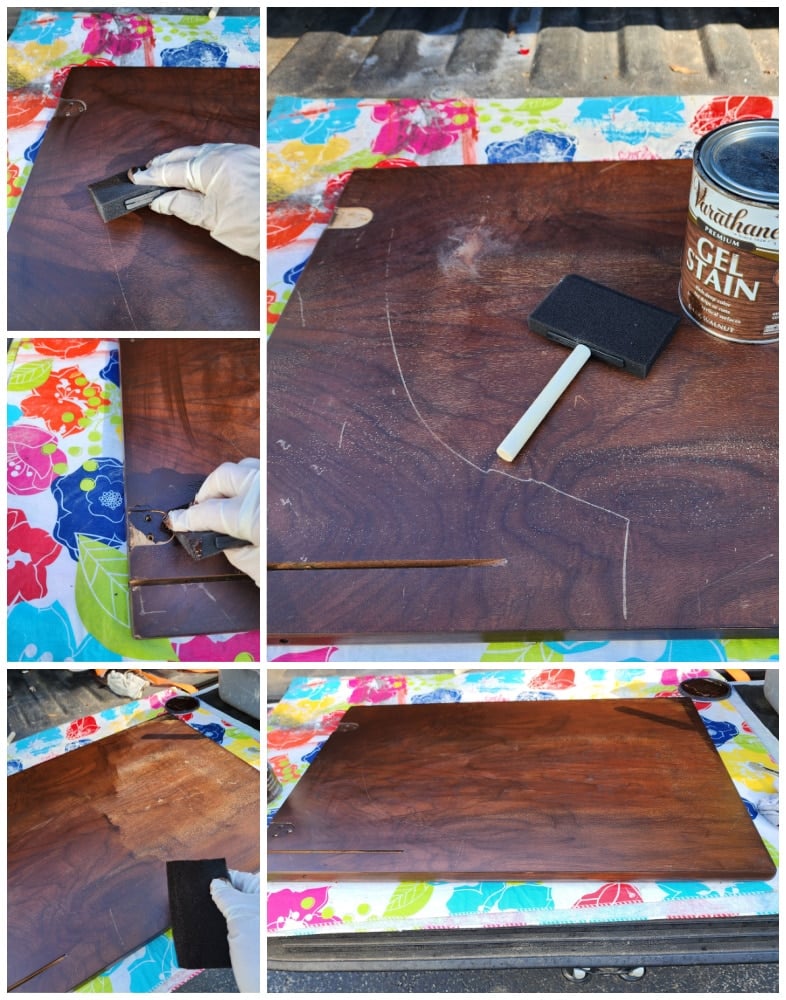
Applying Gel Stain
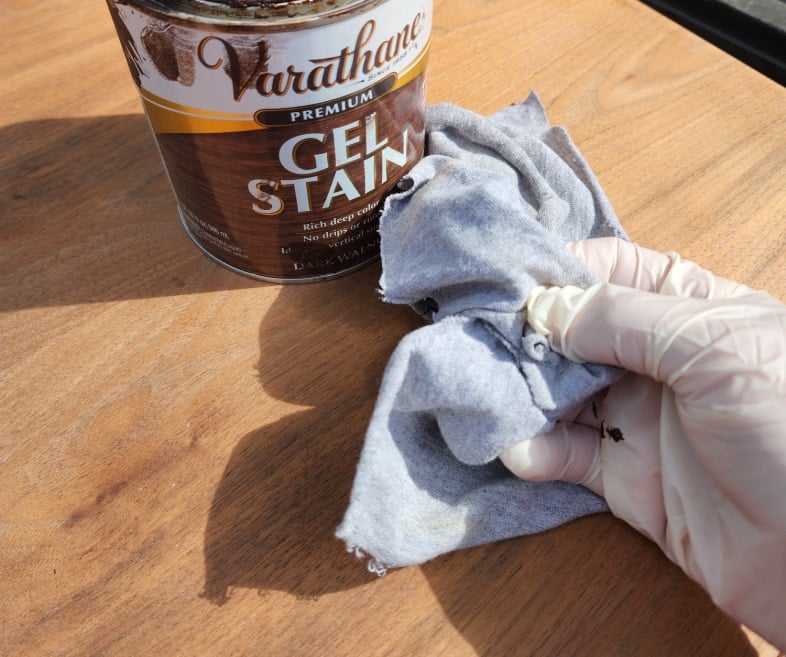
When I left home, I wasn’t sure how well the top would sand, so I brought a Gel Stain. The top was smooth enough that I could have used a regular stain if I had it with me. The color I chose was Dark Walnut. After cleaning the dust away with a cloth, I grabbed a clean one to apply the Gel Stain.
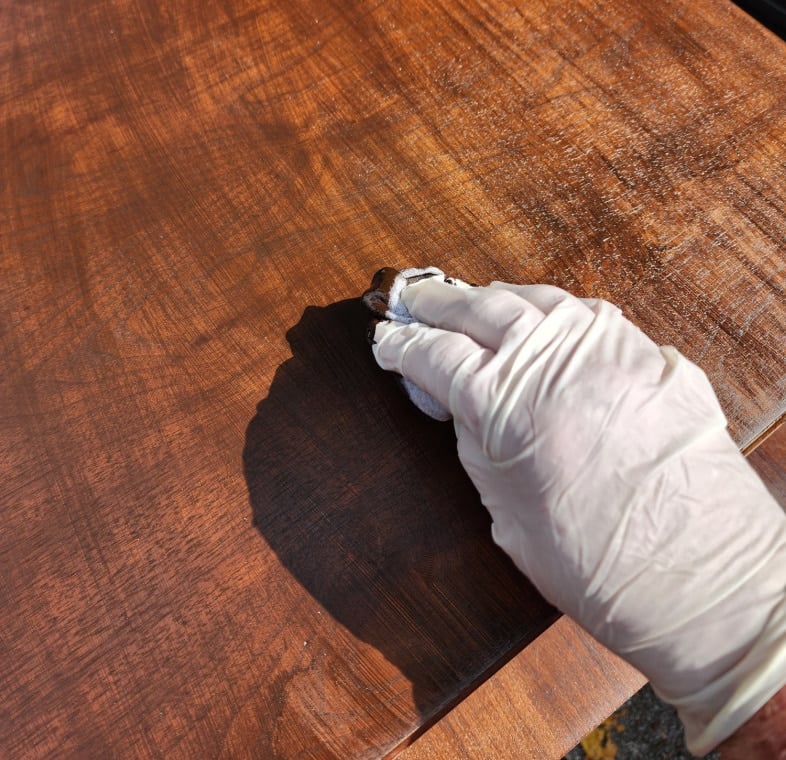
The directions on the Gel Stain said to rub against the grain on the first pass and with the grain on the second coat.
Choosing a Paint Color to go With the Dark Stain
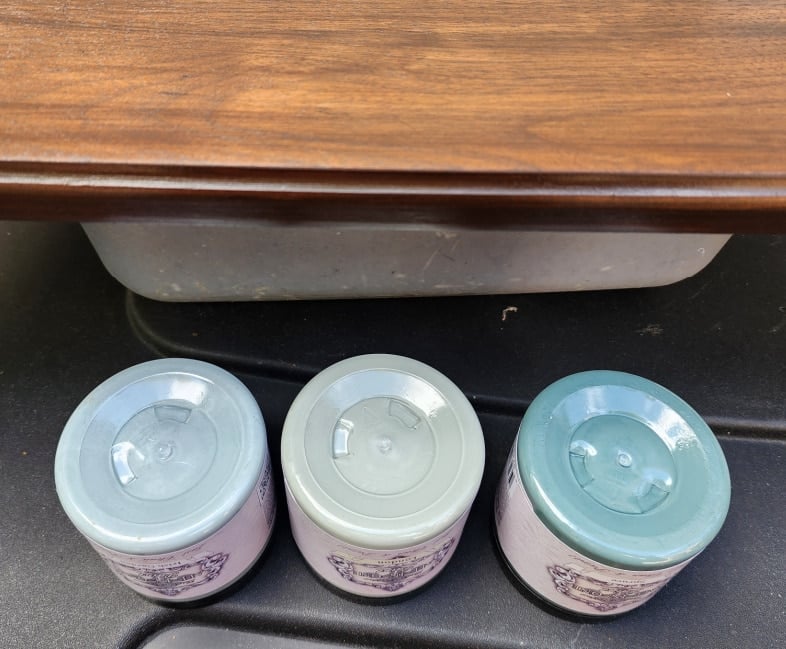
I took three sample jars with me. After the tabletop was dry, I lined up the samples to see which color would go best with the dark stain. London, by HTP All-in-one Paints, was the lucky winner.
Prepare the Sewing Cabinet for Paint
Before I could start painting the sewing table, I needed to remove the handles and other random hardware and screws.
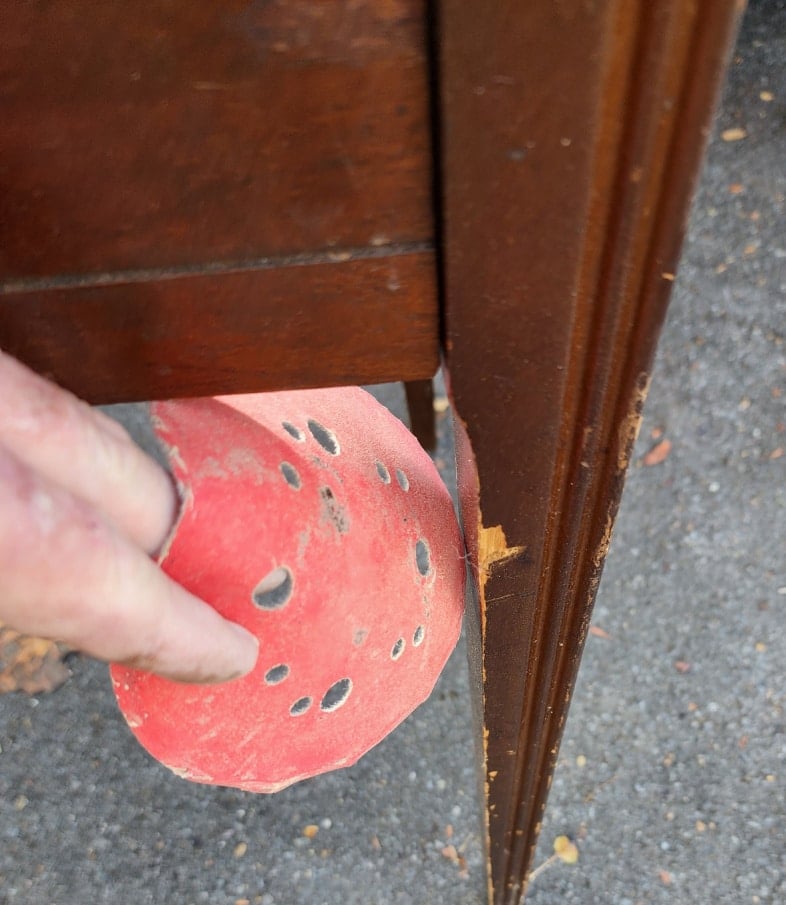
There was quite a substantial blemish on the leg that needed to be sanded and patched.
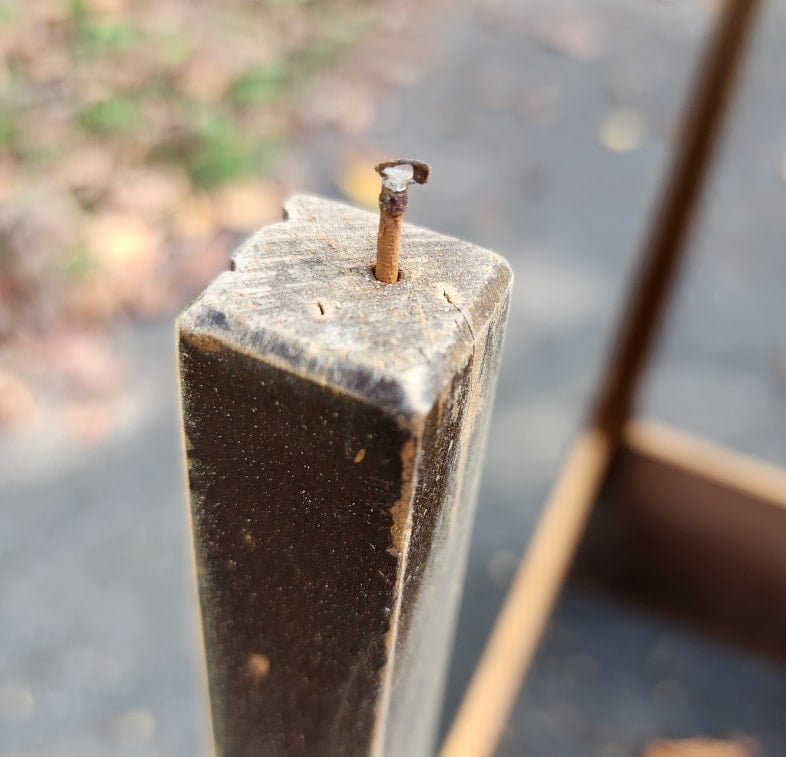
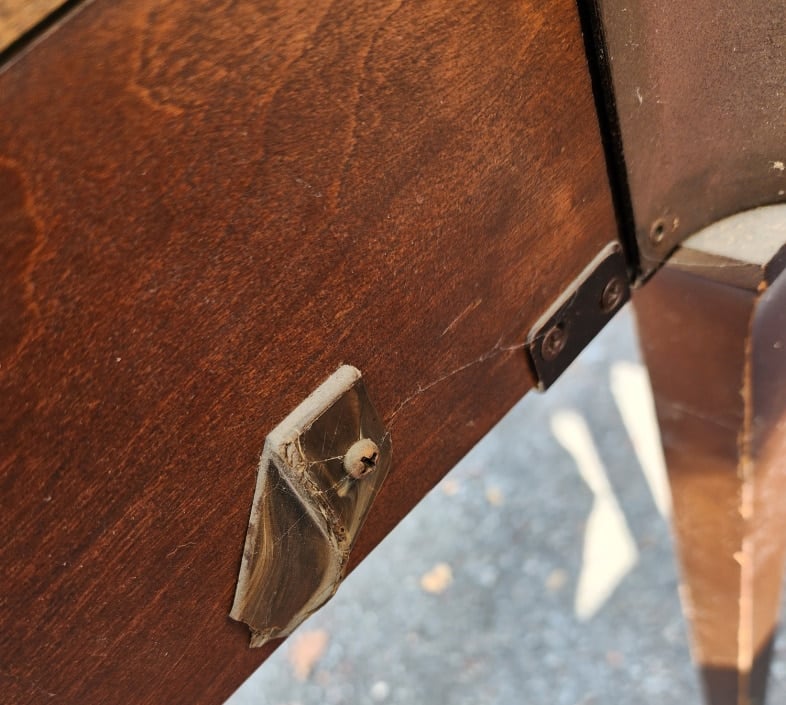
There were plastic pads on the bottom of the legs, which were held in place with long nails. I chipped the plastic piece with a pry bar, then removed all the nails. One nail was very stubborn, so I just pounded it in with the hammer. I will be adding felt pads to the bottom.
This small peg’s function was to hold the small door closed when not in use. You will see later that I chose to keep the door shut permanently.
Patch With Dixie Belle Mud

Dixie Belle Mud was used to patch the scar on the leg of the sewing table. Apply the mud, let it dry, sand, apply more if needed, and sand again.
Clean and Degloss the Shiny Surface
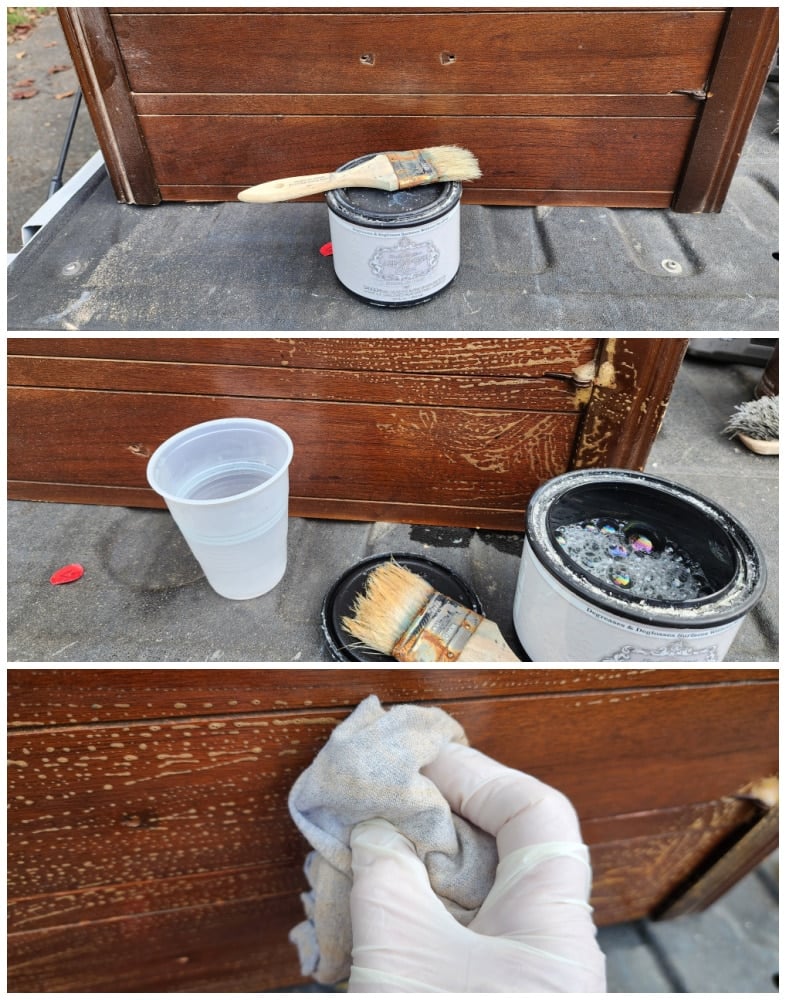
I use HTP Surface Prep to clean and degloss my furniture projects. Sometimes I use their wipes, but this time, because I was going to be away from home with unknown issues, I used the liquid surface prep.
Your chip brush can get very dirty, so I recommend pouring the solution into a container instead of repeatedly dipping your brush into the can. I used a small disposable cup. If your furniture piece is extremely glossy, you will want to rub it with a kitchen scrubby. This sewing cabinet was very old and not so shiny. I wiped the solution off with a scrap of t-shirt fabric.
Related Content: How to Prep Furniture for Painting

I removed that small peg I showed you earlier and replaced it with a screw to permanently hold the little door shut.
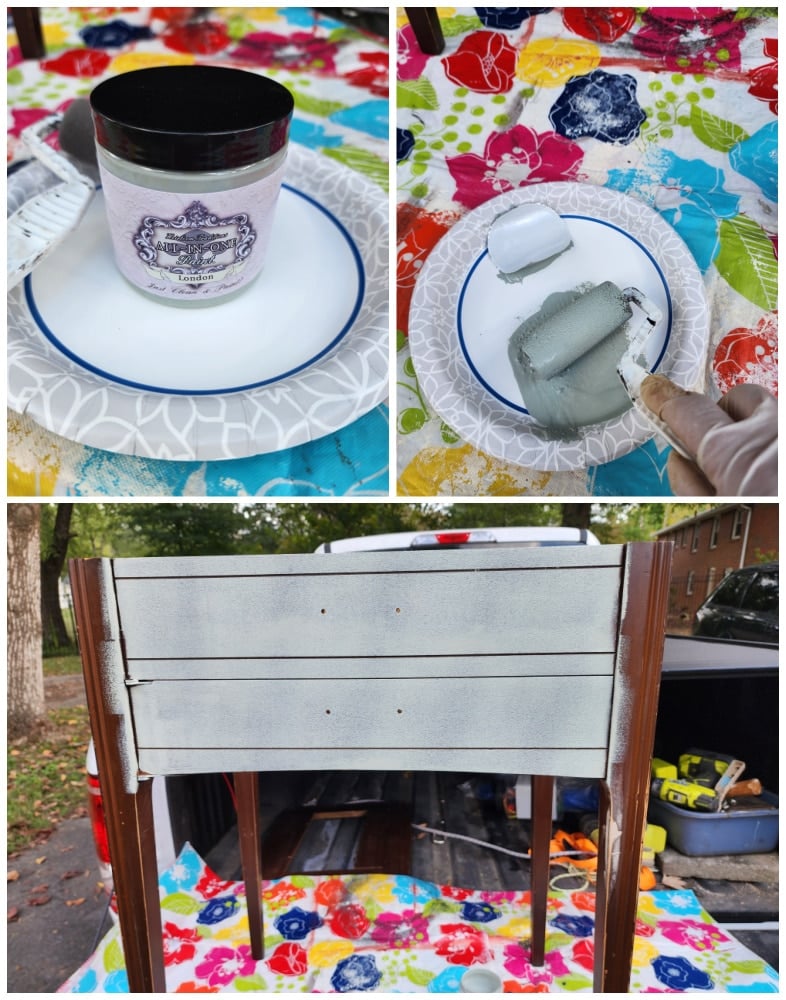
The tools I used on this painted sewing table were a small foam roller, a paper plate, and a small paintbrush to trim the edges. The first coat is the “ugly” coat. Several light coats will not only give you better coverage, but they will also be a more durable finish in the long run.
I typically do 2.5 coats of paint. The half coat is to cover anything that needs a little more paint. I chose not to paint the inside of the cabinet for this project. In fact, I hadn’t planned to do anything to the underside of the lid (tabletop). My plan for this project was to keep it simple, demonstrating that even ugly furniture can be made useful again without a lot of money or time.
A recent Furniture Fixer Upper project involved a sewing cabinet that evolved into something more advanced. Have you seen my Kitchen Island From a Sewing Cabinet?
Don’t Cut Corners to Save Time
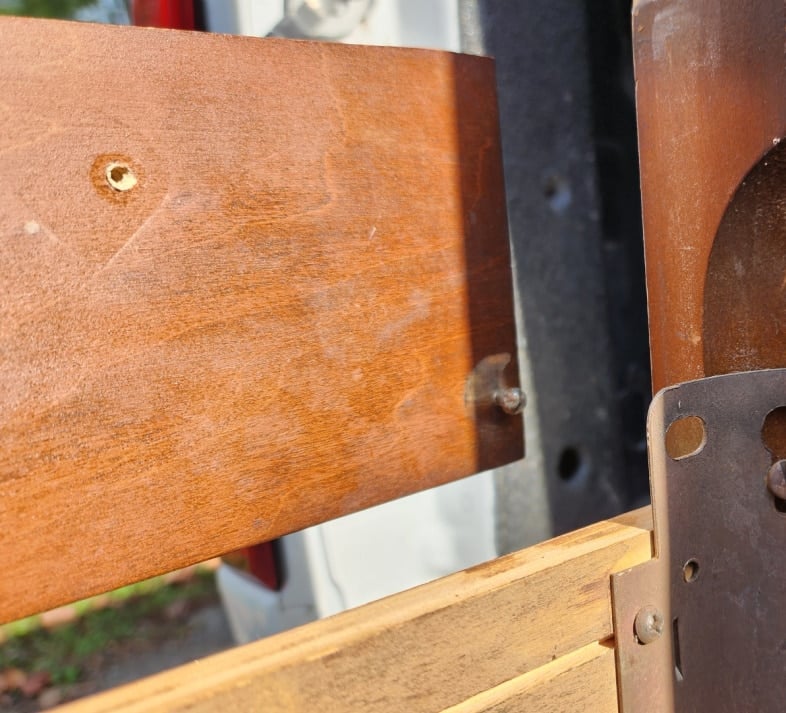
After returning home, it was time to reassemble the painted sewing table. As I flipped the base upside down on the tabletop, the small hinge inset areas were very obvious because they were a different color. Would you believe there was still a price sticker on it, not to mention a heavy scratch across most of the wood?
Granted, this side would only be seen if someone picked it up to put it in their car, or perhaps by a small child playing on the floor under it. Nonetheless, it bothered me to call something done, while it looked so unfinished.
I tried to use a large foam brush, but the handle broke as soon as I tried to spread the Gel Stain. No problem, I used it as a “sponge” and it worked perfectly. The hinge insets were a little more challenging to cover because of their color and roughness.
I do not know what that dark line is on the right.
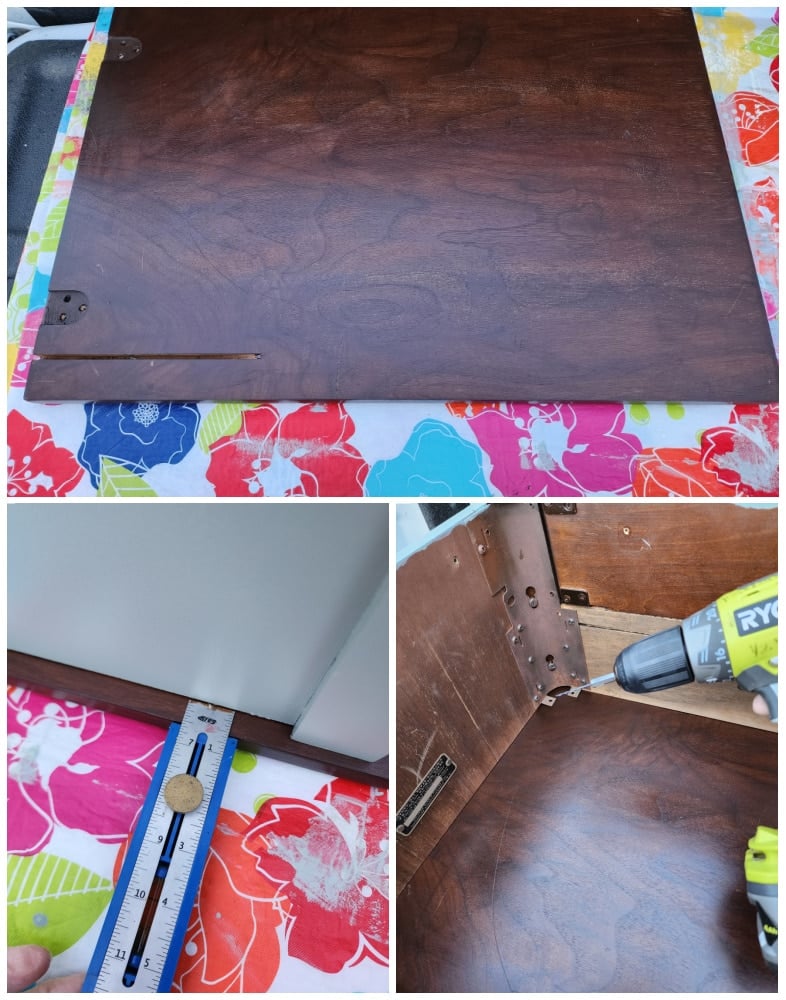
You can see the line is not visible in the photo above. To reattach the base to the lid (tabletop) of the sewing table, I used the original metal leg brackets and the seven screws that I removed. My Kreg Jig Multitool is helpful to ensure that the area on all four sides is equal.
I drilled pilot holes before inserting the screws.
Options for Finishing Off the Painted Sewing Table
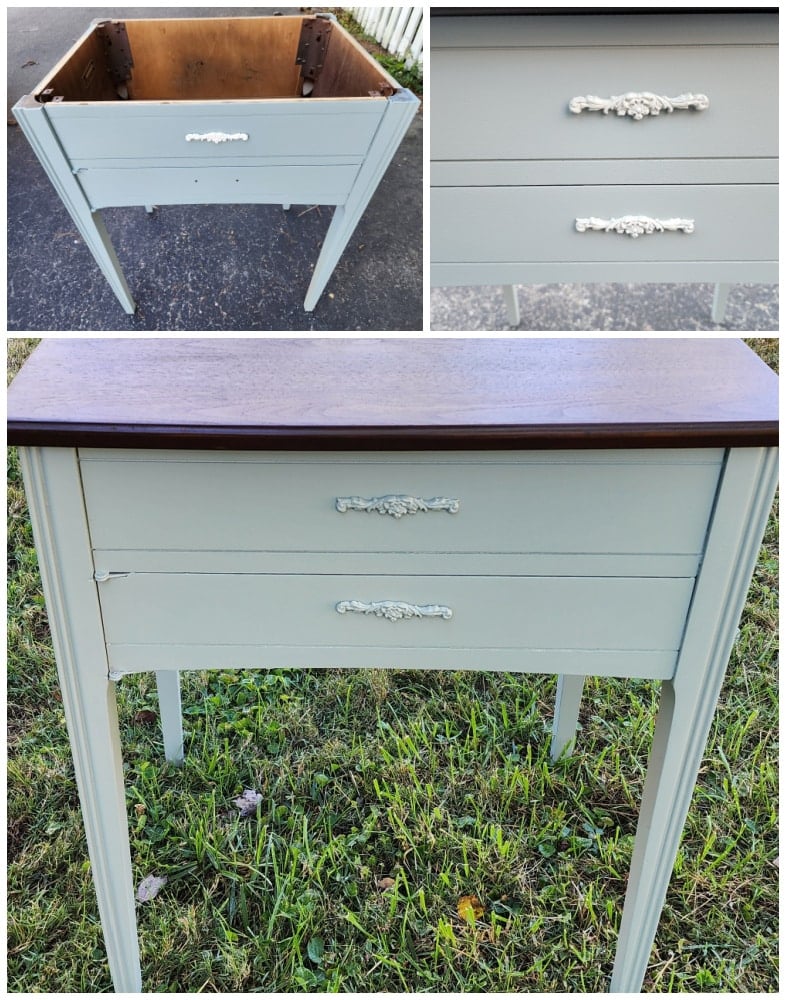
I found some resin molds that I had made earlier in the year. White (top left) was too stark. So, I tried dry brushing with the London. That was so-so. Finally, I painted the flourishes the same color to add a little something and cover up the screw holes. At this point, they are held onto the front using rolled-up scotch tape.
What About the Original Brass Handles?
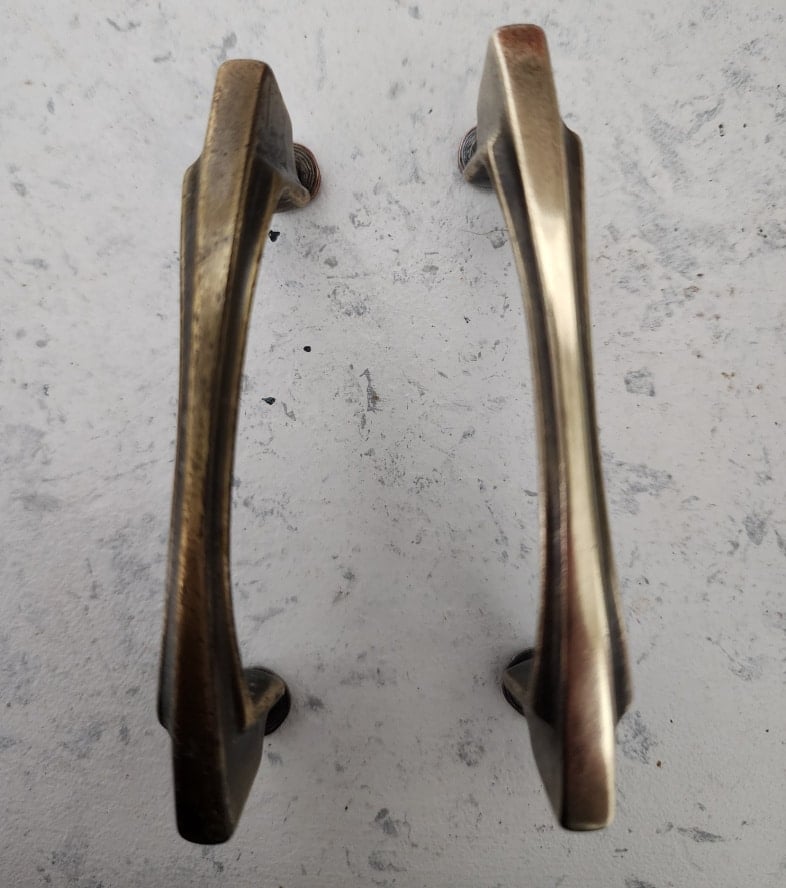
As I was texting with my daughter, she really didn’t like the flourish molds. She asked about the original handles. I didn’t want to use the handles because they don’t “open” anything. I don’t have anything like Brasso, so I used what I had on hand. Rubbing the handles with a thin kitchen scrubby and Norwex Cleaning Paste seemed to work well.
Painted Sewing Table

The soft green color with the dark top is perfect for the original brass handles. I have no qualms about tagging this as the easiest sewing table makeover ever. The only thing that would make it easier is if you glued the lid down to the mounting board instead of removing it. If you wanted a chunkier-looking tabletop, that is definitely an option.
I got some help from my friend Aggie (AI) for styling this little gal.
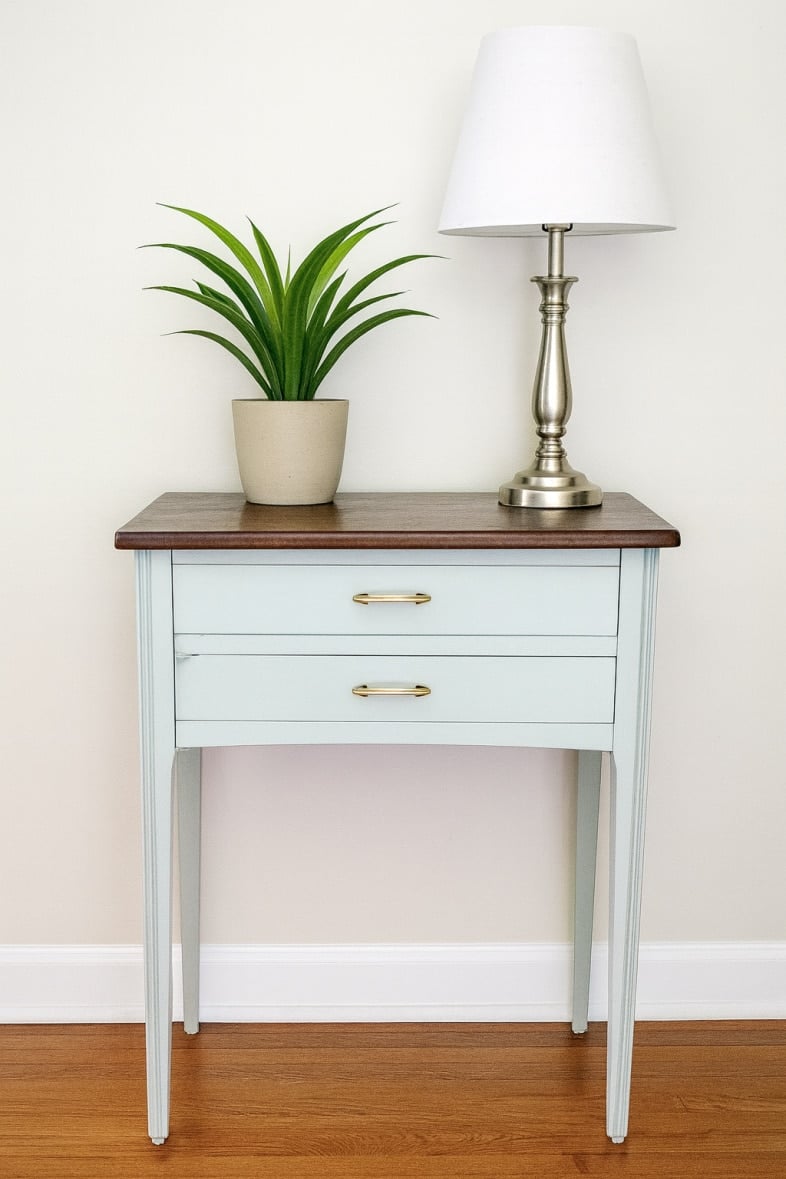
Isn’t she pretty? I would love to keep this painted sewing table, but I just don’t need it. It’s currently being stored in my bedroom, and I’m going to find it difficult to let this one go. Do you love the two-toned color as much as I do?
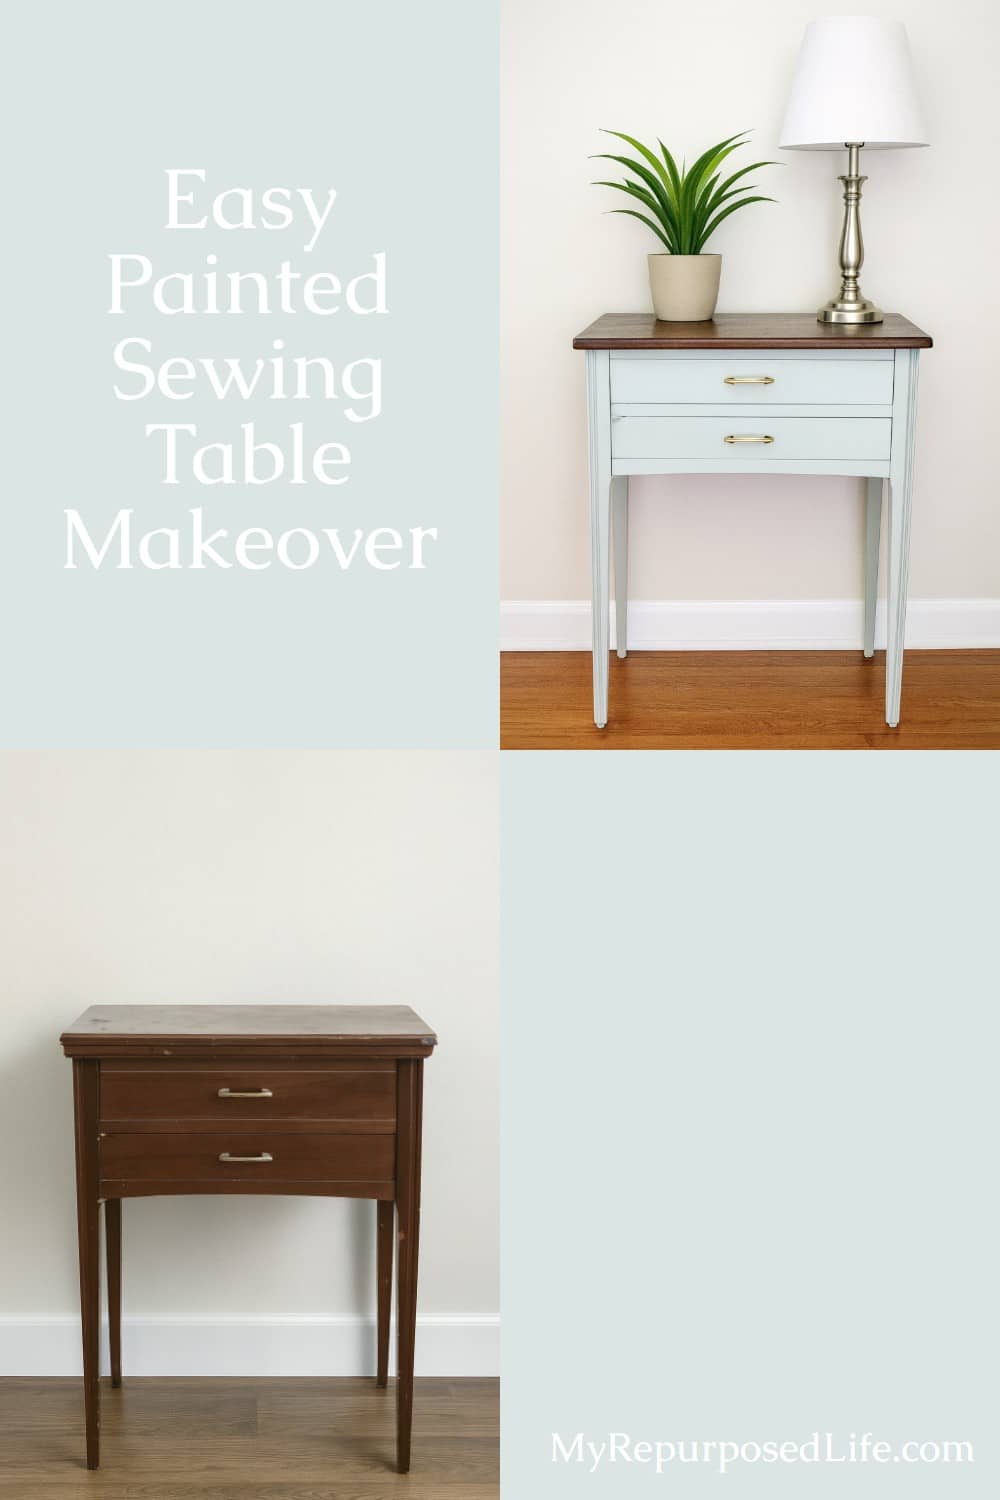
The before-and-after is impressive, but it was so quick and easy to rescue an unwanted piece from the thrift store.
So, tell me. Are you team brass handles or green flourishes?
I love how this small sewing table turned out. The light green color keeps it soft and inviting, while the dark top adds a touch of richness. What was once a tired, forgotten piece is now a sweet little accent table that can fit almost anywhere. It’s proof that even the most worn-out furniture can have a second life with a little imagination and effort.
Let’s see what the rest of our talented and creative team has been up to.
Furniture Fixer Upper Projects
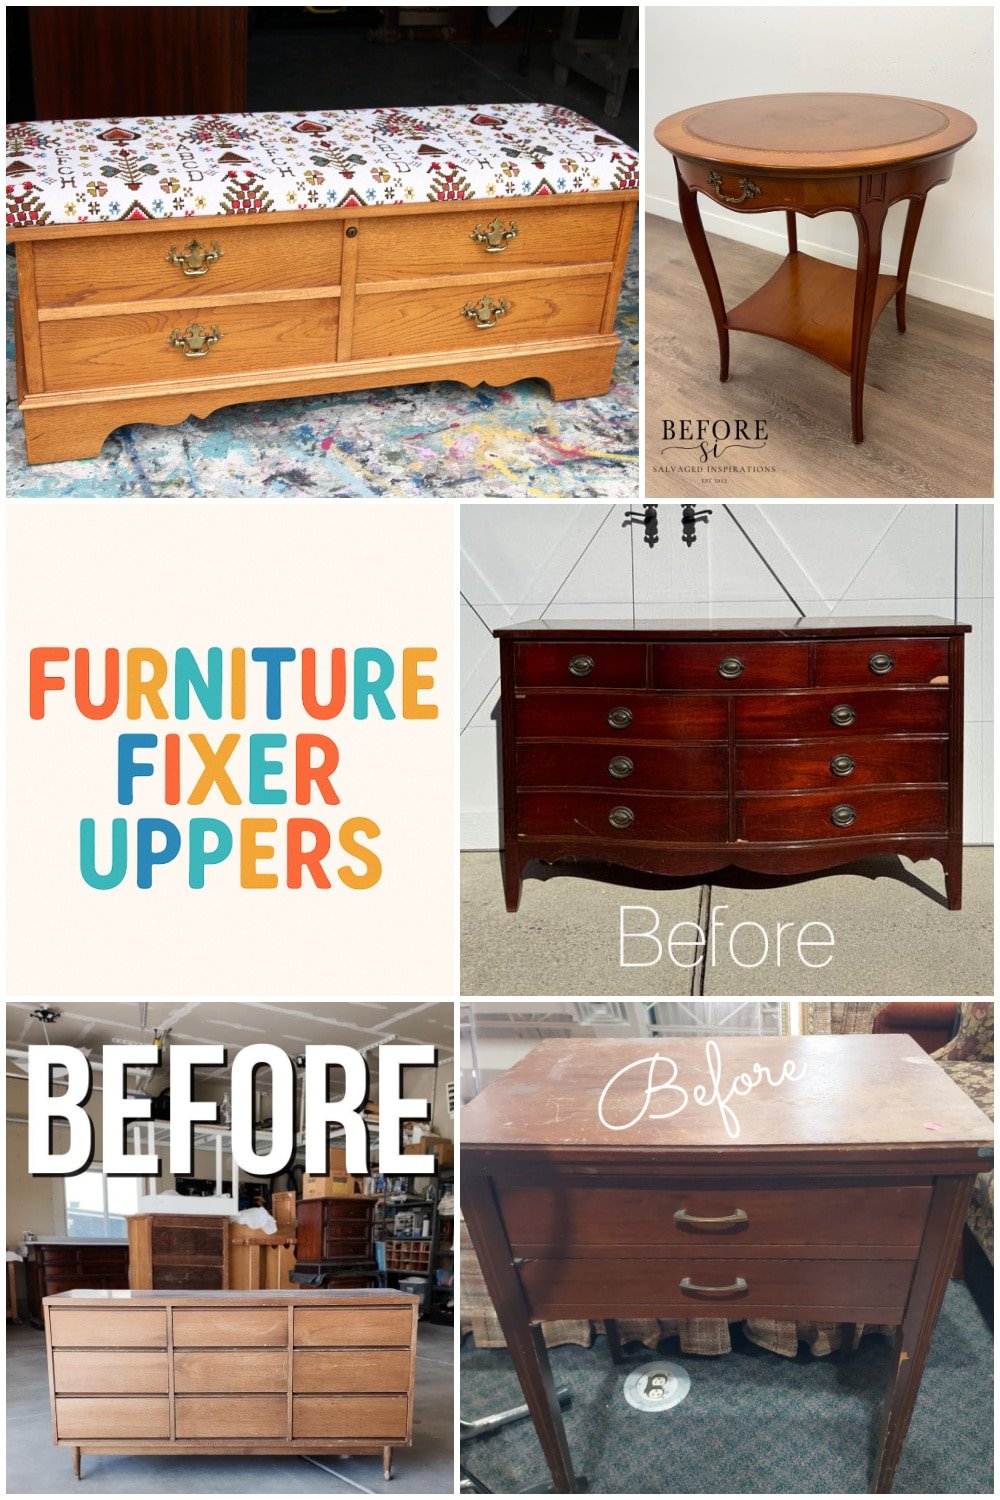
- Painting a Lane Cedar Chest
- How to Restyle and Paint a Leather Tabletop
- Vintage Mahogany Dresser Makeover
- Restain a Dresser Without Stripping
- Painted Sewing Table Makeover (You are here, thank you!)
Such a lovely makeover, Gail! I love the soft green with the top wood finish. Definitely prefer the brass handles even though they are just for show. They fit better with the simple clean lines of this pretty piece. I love it! Nice save, Gail!
I am usually a fan of using the original hardware, but something about the little green flourishes looks cuter to me. Both look good though.
Jennifer
awww thank you for your comment. I will be selling it, so I guess I’ll give the new owner the option to choose which they like best.
gail
So pretty!
I love how this turned out, Gail! That color is right up my alley. I liked the moulds on there, but the originals work too! And the fact that you felt like you had to finish the underside properly says a lot obout your workmanship! XOXO
I’m team brass handles but both are gorgeous! Beautiful makeover Gail! Pinned XOXO … and oh, your friend Aggie has a great eye for styling. 😉 hehe Enjoy your weekend my friend.
Green flourishes because there is nothing for handles to open!
That’s what I was originally thinking, but the handles look so pretty. 🙂
thanks!!
gail
So much better. Love the two tone finish.